Small Bits of Paper: Paisley

Showing posts with label Paisley. Show all posts

My Craft Spot Fall Stamp Release Party - Day 1

Monday, September 2, 2013
Welcome to the My Craft Spot Fall Stamp Release Party!!  We've been working hard (and having heaps of fun) with the FIVE new stamp sets and TWO new sets of metal dies!!  This week, we'll showcase our projects each day, ending with a blog hop on Saturday - with prizes at EACH stop along the way!

 
Today, we are sharing projects made with the NEW Jar Basis stamp set and Jar Basics metal dies.  I dressed up a gift bag - perfect for giving away preserves. I used some patterned paper from my stash to create a mat and layered it with a fun jar and topper from the NEW Jar Basics metal dies.  Each piece was stamped using the NEW Jar Basics stamps.  Aren't these so fun?!  My preserves label was made with another stamp from the Jar Basics stamp set - and that fabulous little tag is from the NEW Jar Basics metal dies set too!  Inside my jar, I added a strawberry cut from Paisley and stamped with a Peachy Keen face.


Did you notice my little jar tag?  The little jar is from the same Jar Basics metal dies set.  (The lid fits both jars.)  And my sentiment is also from the NEW Jar Basics stamp set! I finished everything off with some Holly Green baker's twine.

Be sure to head over to My Craft Spot to see all the other fabulous creations made by the rest of the design team.  Don't forget to leave a comment there for Kimberly for your chance to win today's prize: a Spooky Treats stamp set!

 
14

My Craft Spot Spring Stamp Release Party - Day 2

Tuesday, April 23, 2013
Welcome to Day 2 of the My Craft Spot Spring Stamp Release Party! Today, we are showcasing projects created with the NEW Cute Critter stamp set. This set is full of FUN sentiments!


As soon as I saw the NEW Cute Critter stamp set, I knew exactly which stamp I wanted to use first.  I based this card on an ATC I made years ago.  My daughter's black cat is full of CAT-titude, so I'll tuck this card away to give to Erin at some point.


The black cat on my card is from Paisley.  I fancied up her face a bit with a white gel pen and gave her some gems for her collar and crown.  The frame behind her is from Fancy Frames and embossed with my Cuttlebug.  Patterned paper is from Making Memories Black and White paper pad.  The fun mouse border is a Martha Stewart Halloween punch - but worked so perfectly with my Queen cat that I used it for the Spring stamp release!  The photo corners are from an EK Success punch.  I created a border for the bottom of my card and stamped it with one of the NEW My Craft Spot Cute Critter sentiments.  I then added a few more gems to finish things off.

Don't forget to check out all the FUN Cute Critter creations over at My Craft Spot today - and leave a comment there for your chance to win today's prize, a Birthday Wishes stamp set.  I'll see you tomorrow for another new project - created using another NEW stamp set and NEW metal dies!    
15

Girly Girl Birthday Card

Monday, February 13, 2012
Click HERE to see today's
Fantabulous Challenge project post.

My niece will be 14 on Sunday and I made this card for her.  Sophie is all girl so the timing is perfect for this week's My Craft Spot "Girly Girl" project challenge.


I used Elegant Edges and Plantin SchoolBook for the card base.  The pink mat is cut from a metallic paper and embossed with my Cuttlebug.


The snail is from Paisley and cut with scraps left over from my Valentine's Day projects.  I enlarged the flower on the shell in order to cut a circle big enough for the little treats cup from Stampin' Up.  I filled the cup with pink Smarties (candy coated milk chocolate).  The fun googly eyes were a gift from my sweet friend Carri at DoubleClick Connections.  I've looked all over for them and have never been able to find them around here - so Carri very kindly sent me a pack.  They're always a hit on my critter cards!


The sentiment is from My Craft Spot's Friends & Neighbours Inside & Out stamp set.  I punched it out with a Stampin' Up punch and layered it over the negative cut from the flower on the snail.  I did lots and lots of doodling on my card, using both a white gel pen and black marker.  I also dressed up my snail with some snow white crinkle ribbon and Divine Valentine baker's twine - both from My Craft Spot.


The inside of my card was stamped with a sentiment from My Craft Spot's Candy Corn Kisses stamp set.  Although the stamps are from a Halloween line, I thought the sentiment was perfect with the candy card I had made. 

Please head over to My Craft Spot to check out the rest of the Girly Girl projects made by the design team - and then be sure to create your own and link up to be eligible for this week's fabulous prize!

*I will also be linking up this card for this week's Exploring Cricut Challenge: It's So Sweet. 
34

My Craft Spot Valentine Stamp Release & Giveaway

Thursday, February 2, 2012
I am so excited to be showing you some of the projects that I've made with the new My Craft Spot Valentine stamp sets:  Build a Valentine and Always and Forever.  These sets are just perfect for creating all sorts of Valentine and love projects.  There's even an anniversary stamp!


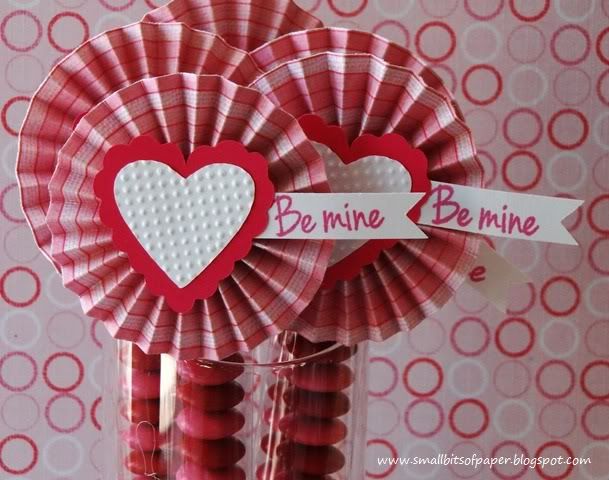
My first project is a set of cello bags filled with red and pink Smarties (candy coated milk chocolate, similar to - but much better than - MandMs).


For the toppers, I made rosettes from patterned paper and then added hearts from Gypsy Wanderings.  The white hearts are embossed using the inside of a 3x3 Cuttlebug butterfly folder.  I finished things off with a little "Be mine" tag from the Always and Forever set.  These treats are currently displayed on our dining room table and make for a lovely way to decorate for Valentine's Day - with a treat to enjoy at the end!


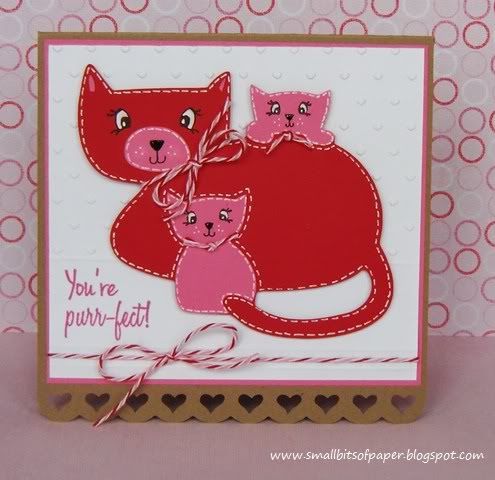
The base of this card was made with Elegant Edges and Plantin' SchoolBook.  I embossed the top portion of the white mat with a tiny hearts folder from the Cuttlebug Love Language set and scored some lines with my Martha Stewart score board.  The cat image is from Meow and I stamped the cats' eyes with stamps from Peachy Keen.  The noses are covered with Glossy Accents and I drew the little mouths by hand.


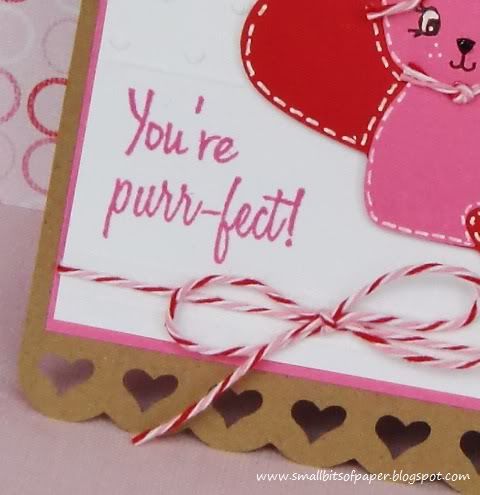
The sentiment is from the new Build a Valentine set and I finished things off with some fun Divine Valentine twine from My Craft Spot and lots of faux stitching.


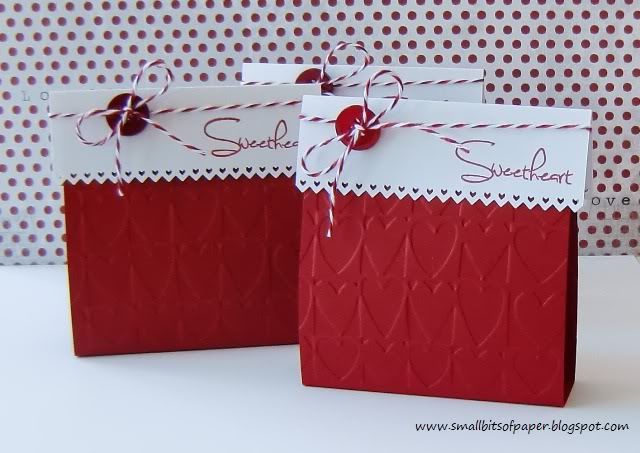
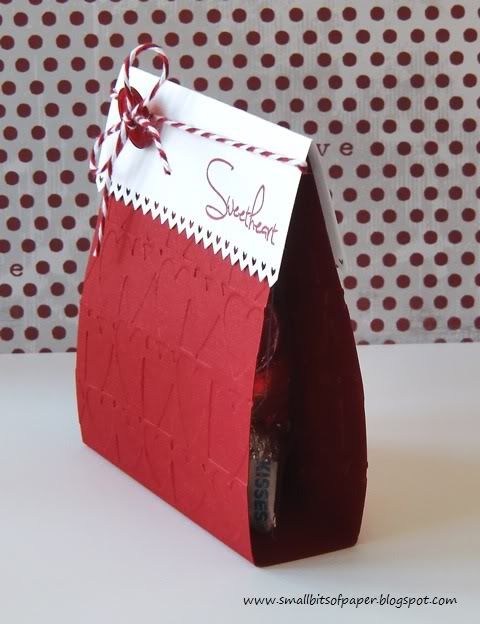
These candy tents were cut by hand, with the topper punched with a Stampin' Up border punch.  The bases of the tents were run through the Cuttlebug using the Heart Blocks embossing folder.


I stamped the tops with a Sweetheart sentiment from Always and Forever.  I added some baker's twine from My Craft Spot and a button to each - as well as a little baggie of Hershey's Kisses - to complete my project.


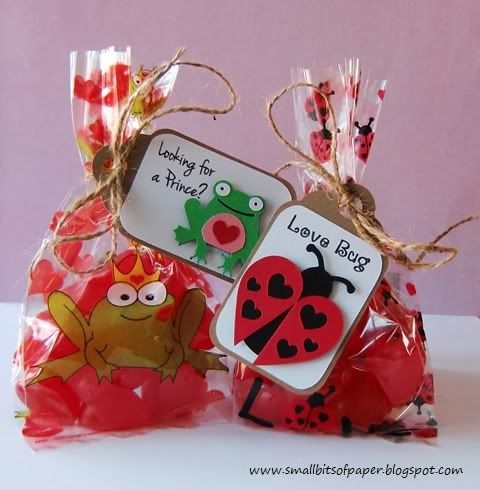
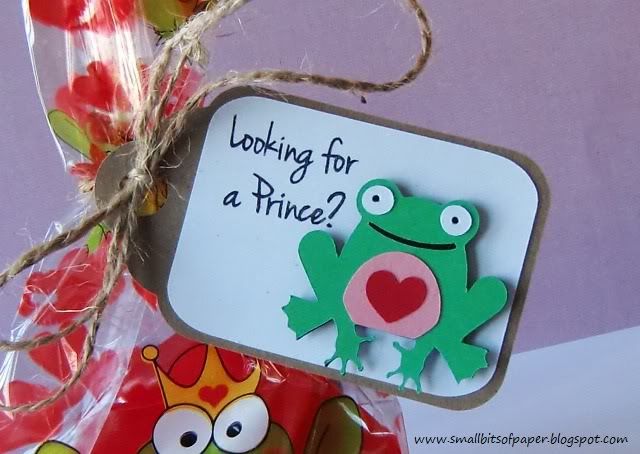
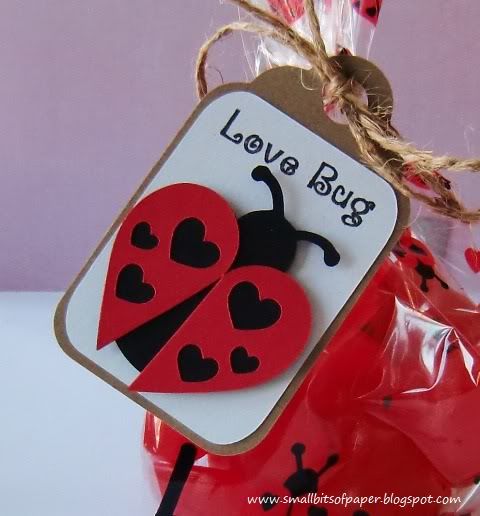
When I saw these treat bags at our local Bulk Barn, I couldn't believe my eyes!  It looks as though they were made to go with the Build a Valentine set from My Craft Spot!  Of course, I had to buy some and filled them with some heart-shaped jujubes. Both tags were cut using Wrap It Up and tied with some twine from my stash.  The tags were quick and easy to put together - but make for such a fun way to dress up the bags.


For the frog bag, I cut a little frog from Paisley and then stamped the "Looking for a prince?" sentiment from Build a Valentine.


The base of the ladybird is from Walk In My Garden and I created the custom wings (to coordinate better with the ladybirds on the bag) using hearts from Create a Critter, cutting the larger heart in half.  The "Love Bug" sentiment is also from Build a Valentine.


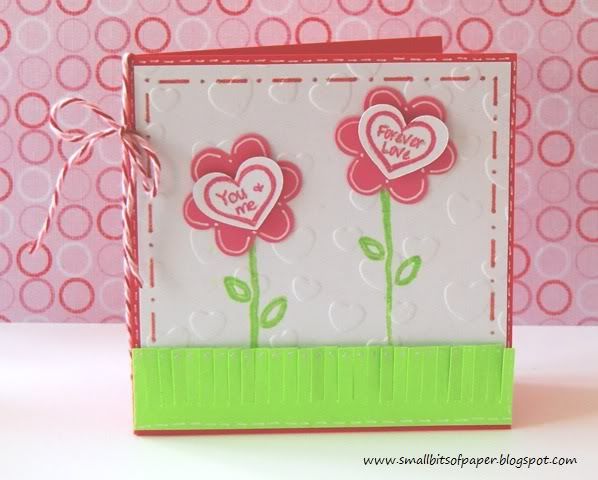
My final project is a little card made with conversation heart stamps from Build a Valentine.  I stamped the hearts on little hearts cut from Create a Critter.  The flowers were also cut from Create a Critter.  The stems are stamped and the mat embossed with a Hallmark embossing folder.  The grass was cut using Martha Stewart fringe scissors.  I did some doodling and also went over the sentiment and pink "stitching" and grass with a Stardust gel pen - so there's a nice glimmer in real life.  I finished everything off with some Divine Valentine twine from My Craft Spot.

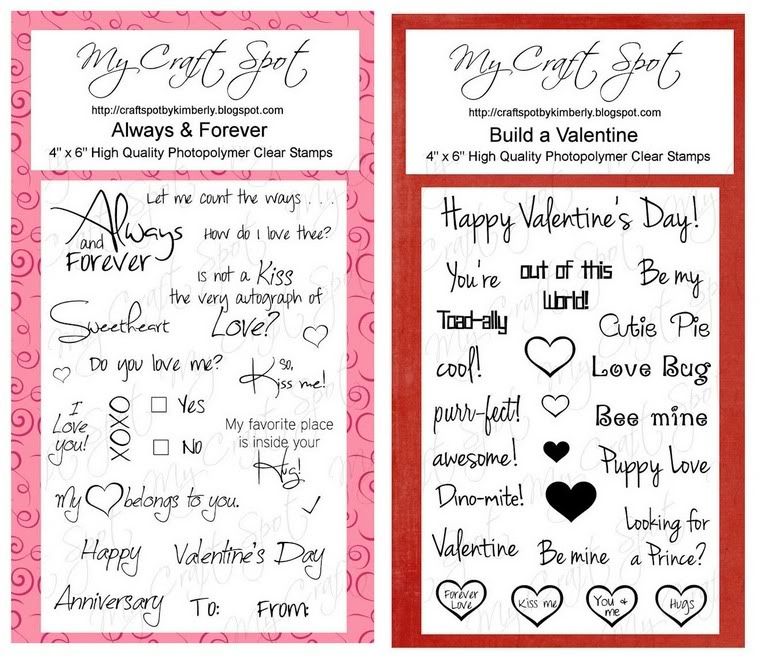
Here are the full sets of the stamps I've used for my projects above.  For many more project ideas and inspiration, head to My Craft Spot to see what Kimberly and the rest of the design team have been making!  I always love to see the different ideas and creations.

~ G I V E A W A Y ~
How would you like to win a My Craft Spot stamp set of your choice?  Kimberly has very generously donated a set to be given away on my blog.  All you need to do is:
  1. make sure you are a follower here at Small Bits of Paper
  2. leave a comment on this post.  
Don't forget to tell me which My Craft Spot stamp set is your favourite, in case you are the winner!  I will draw a name at random and announce the winner on Monday, so you have until Sunday at noon (EST) to enter.

~ W I N N E R S ~
Thanks to all of you who left such lovely comments last week's blog hops!  The winner of the $10 My Craft Spot gift certificate for the Cards for Kids Valentine's Day Blog Hop is Larelyn of Handmade from My Heart and the winner of the $10 My Craft Spot gift certificate for the Cricut Craftin' Grammy's Cricut Friends Blog Hop is Bobby of Bits & Pieces.  Congratulations Larelyn and Bobby!!  Please email me at smallbitsofpaper @ hotmail.com [remove spaces] so I can arrange to have your gift certificates sent to you.

*I am going to link up my Smarties tubes and Sweetheart tents at Decorate to Celebrate, where this week's theme is Valentine's Day Party.
61

Bright and Fun Birthday Cards

Monday, August 8, 2011
Two in one!  My Craft Spot and Fantabulous Cricut projects!

This week's challenge at My Craft Spot is "It's Hot Out There" - use hot, bright colours on your projects.  It's also time to "Get Buggy" at Fantabulous Cricut.  I decided to make some fun birthday cards which fit the criteria for both challenges!  (It's not actually my design team week at Fantabulous Cricut but I decided to join in anyway!)
I used Paisley for the ladybird and bee and Mini Monograms for the scalloped square frames.  I embossed the top layer of the frame with my Cuttlebug Seeing Spots folder.  I added some pearls and gems to insects as well and then popped the insects on the mats.  I used a My Craft Spot "Happy Birthday" stamp from Inside and Out Set #2.  I finished things off with the some absolutely fabulous, bold crinkle ribbon, using Caribbean and Hot Pink.  I LOVE the new colours!!  

If you haven't checked things out recently, be sure to look over all the amazing crinkle ribbon at My Craft Spot.  There is sure to be something to suit your style!  And if you are ribbon challenged (like me!), you'll find crinkle ribbon so easy to work with and very forgiving.

I invite you all to check out the other design team crafts and then link up your own "It's Hot Out There" projects at My Craft Spot this week.  Also, please head over to Fantabulous Cricut to check out the design team creations and link up your buggy projects too!

PS  Happy, happy birthday to my middle guy who is 14 today!!  Also, we're leaving tomorrow for a camping holiday but I'll look forward to catching up with your blogs when I return.

******************
Coming soon!  Get ready for lots of fun with My Craft Spot during the week of August 22.  The design team is busy working away on creating some fabulous projects using new stamp sets!  You'll get to see them all during the release week, with a new stamp set released each day (Monday to Thursday).  Plus, to end all the fun, Kimberly has organized a blog hop for Friday and the the entire team is taking part - with My Craft Spot prizes to be given away on EACH of the design team blogs!  You won't want to miss it!!
******************
34

Elephant Crossing Guard

Monday, July 11, 2011
It's time for another Monday challenge at My Craft Spot.  For those of you who have been followers for awhile, you know that each summer and Christmas, I make a card for my youngest son's crossing guard and always include a stop sign.  Lynn tells me that she keeps and displays them all!  This is the card I made for this end-of-year celebration.

The challenge this week at My Craft Spot is "Ink it Up" - so I did lots of inking around the edges.  Most of the card was made with scraps, with the exception of the kraft card base.  I created the card by welding together two of the flower image from Plantin' SchoolBook using my Gypsy.  (One was flipped.)  The blue mat is part of the same image and I embossed it using the Polka Dots folder through my Cuttlebug.  The elephant is from Paisley and the STOP sign is from Going Places.  I welded a handle to the sign using George and Basic Shapes and added a gem for the flashing red light.  I did some doodling and added Glossy Accents to the sunglasses.  I also added a "Hip Hip Hooray" sentiment from My Craft Spot's Sweet Sentiments #2.  The sentiment is perfect for end of school (and start of summer holidays)!  To finish things off, I added some sky blue crinkle ribbon and red baker's twine - both from My Craft Spot.

Please head over to My Craft Spot to see the rest of the design team inspiration - and to link up your own "Ink it Up" project!


(I'm still up to my eyeballs in readings, research, papers and presentations.  This month will continue to be incredibly busy and I look forward to visiting your blogs as I am able.)
21

Basket Case Winners and Quick Little Baskets

Tuesday, April 19, 2011
First of all, I'd like to offer a huge thank you to all the lovely comments left for me during the "It's a Basket Case" Blog Hop, hosted by Rhonda of Scrap Happens with Rhonda.  I had such a wonderful time creating my projects and sampling the chocolates to ensure freshness and tastiness.

I used Random.org to select the winners.  For Day 1, the winner of the Baker's Twine from My Craft Spot is Deb Palmer (no blog address available).  For Day 2, the winner of their choice of Crinkle Ribbon or Baker's Twine (to a value of $9.99) is Jacqueline of Made by Jacqueline.  Congratulations, ladies!!  Please contact me at smallbitsofpaper(@)hotmail.com with your information so I can arrange to have your items sent!  You have one week to claim your prize.
I made these little baskets using Easter 2010.  I used Accent Essentials for the label and Paisley for the little flower on top.  (This flower cut matches the shape of the flower on the handle perfectly.)  The sentiment is a stamp from My Creative Time's Color Me Happy set.  The baskets are quite small, having been cut at 5" and then assembled.  I also made my own Easter grass to go inside.  (Instructions can be found at Fantabulous Cricut's Quick Tip Tuesday post.)  These are very simple and took next to no time to create.  I thought they'd be a nice treat at each place setting for Easter lunch.

One last thing... My friend, Natasha of Crafting with Natasha, is giving away a wonderful DCWV "Green Tea" paper pack when she reaches 200 followers.  Natasha has such a positive and upbeat outlook on life and it's been a delight for me to get to know her through our blogging.  Go and check out her blog!!
15

Embossed Card and Gift Card Holder

Monday, February 21, 2011
This week at FCCB, the theme is "Emboss It!".  When I first got my Cuttlebug, I left it in the box for about 6 months before I decided to use it.  Once I opened it, there was no turning back.  I LOVE to emboss various elements of my paper crafts.

For this project, I used Paisley at 4 inches to cut the little outfit.  I embossed the white mat with a Cuttlebug Happy Birthday folder.  The dress was embossed with my Seeing Spots folder and the belt and straps with a butterfly folder from a die/emboss combo.  I punched some corners with an EK Success punch, added a flower and some gems and the card was finished.

I also used Paisley to make the gift card holder.  I did some manipulating in order to create the front panel, which I also embossed with Seeing Spots.  As the folder was not quite large enough for the pink panel, I used an SU border punch to create a strip in the middle.  The panel is adhered along the sides and bottom only, creating a pocket for a gift card.  I used a variety of punches to create little embellishments for the bag and also added some gems.

Head on over to Fantabulous Cricut.  You can use any type of embossing you like to enter this week's challenge.  Just remember that you must have a Cricut cut somewhere on your creation.

I'm also entering this at Two Scraptastic Gals where the challenge is to use Paisley.
19

Thanks for OWL You Do

Tuesday, January 18, 2011
As soon as I saw the challenge at Jitterbuggin', I knew exactly what I wanted to do. We had to use a favourite Cricut bird and include some pink, and incorporate them into the sketch provided.  I've had the Stampin' Up Picture This set since last spring and have wanted to use the "Thanks for OWL you do" sentiment.  It worked perfectly for this challenge - so I finally opened up my stamp set and made use of it!  I'm really trying hard this year to use the things I've got.  I have too many unopened and unused items.
The circles on my card were cut from George and Basic Shapes.  I cut three circles - two solids and one silhouette.  The patterned papers are from DCWV's Spring Stack (I can't wait for spring!) and the cardstock pieces used were all from my scrap folder.  The owl was cut at 2 inches from Paisley and I ran the top layer through the Cuttlebug, using the argyle folder.  I then cut a branch from Create-a-Critter and embossed the leaves with a small butterfly folder.  I punched the sentiment with a Stampin' Up punch and also added another flower just like the one on the owl's wing, but with the colours reversed.  I popped the owl and branch as well.  I added some doodling and a couple of gems and added some Glossy Accents to the eyes too.

Here's the sketch:
16

conCATulations

Thursday, May 20, 2010
I made this card for a young couple I know who are graduating from college in a couple of weeks.  Years ago, I found a stack of cat paper and knew I had to have it.  I think I've only ever used three sheets before today!
I cut the cat from Paisley and the graduation cap from Everyday Paper Dolls.  The frames around both the cat and sentiment are from Ashlyn's Alphabet.  (I've really been enjoying Ashlyn's Alphabet lately.)  I embossed the top layer of the frame under the cat.  I used two border punches.  I believe that one is from EK Success, and the mouse border was created with a Martha Stewart punch.  I added some ribbon and a few gems, drew the cat's face, and I assembled.
This week, Practical Scrappers has a challenge to use patterned paper.  As well, Peachy Keen Stamps Challenge posted a sketch which I followed.  I will enter this card at both of those blogs.
20
Former Design Team Member at My Craft Spot (2011-2015)
My Craft Spot


Powered by Blogger.
Follow on Bloglovin

Followers

>