Small Bits of Paper: Gypsy Wanderings

Showing posts with label Gypsy Wanderings. Show all posts

My Craft Spot Valentine Stamp Release & Giveaway

Thursday, February 2, 2012
I am so excited to be showing you some of the projects that I've made with the new My Craft Spot Valentine stamp sets:  Build a Valentine and Always and Forever.  These sets are just perfect for creating all sorts of Valentine and love projects.  There's even an anniversary stamp!


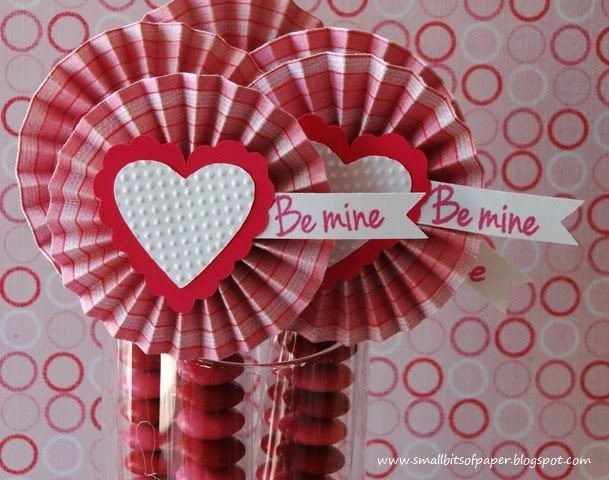
My first project is a set of cello bags filled with red and pink Smarties (candy coated milk chocolate, similar to - but much better than - MandMs).


For the toppers, I made rosettes from patterned paper and then added hearts from Gypsy Wanderings.  The white hearts are embossed using the inside of a 3x3 Cuttlebug butterfly folder.  I finished things off with a little "Be mine" tag from the Always and Forever set.  These treats are currently displayed on our dining room table and make for a lovely way to decorate for Valentine's Day - with a treat to enjoy at the end!


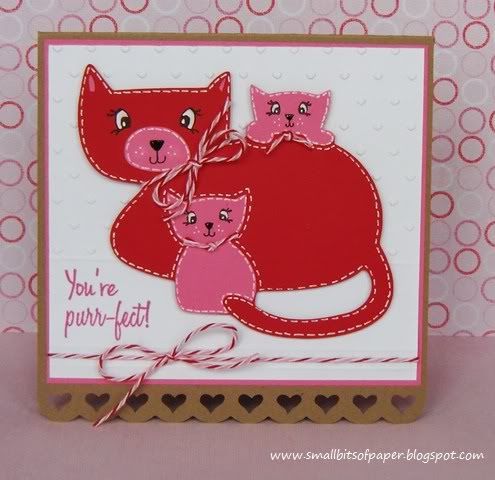
The base of this card was made with Elegant Edges and Plantin' SchoolBook.  I embossed the top portion of the white mat with a tiny hearts folder from the Cuttlebug Love Language set and scored some lines with my Martha Stewart score board.  The cat image is from Meow and I stamped the cats' eyes with stamps from Peachy Keen.  The noses are covered with Glossy Accents and I drew the little mouths by hand.


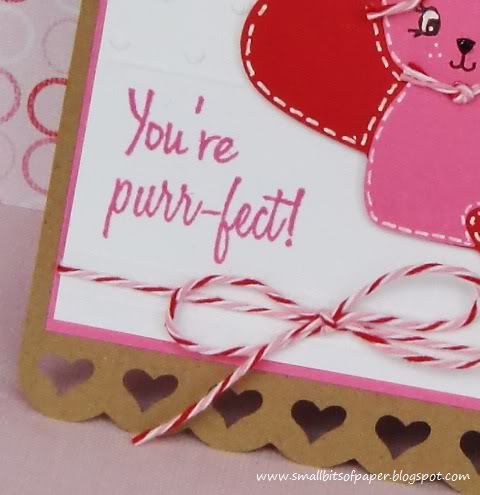
The sentiment is from the new Build a Valentine set and I finished things off with some fun Divine Valentine twine from My Craft Spot and lots of faux stitching.


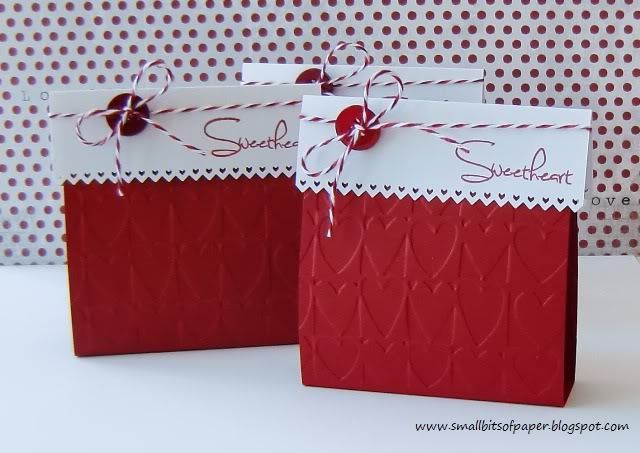
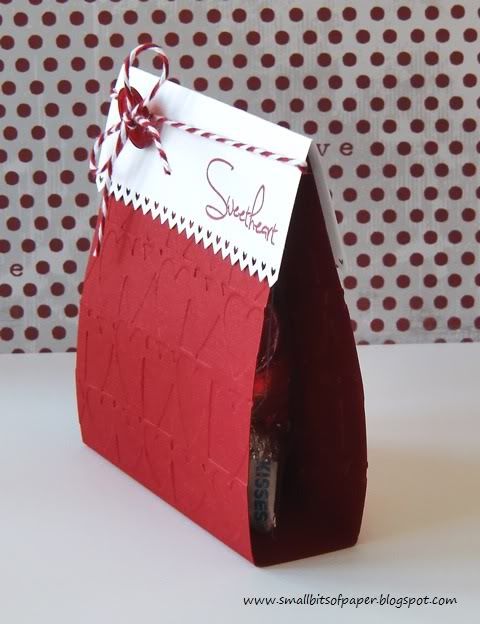
These candy tents were cut by hand, with the topper punched with a Stampin' Up border punch.  The bases of the tents were run through the Cuttlebug using the Heart Blocks embossing folder.


I stamped the tops with a Sweetheart sentiment from Always and Forever.  I added some baker's twine from My Craft Spot and a button to each - as well as a little baggie of Hershey's Kisses - to complete my project.


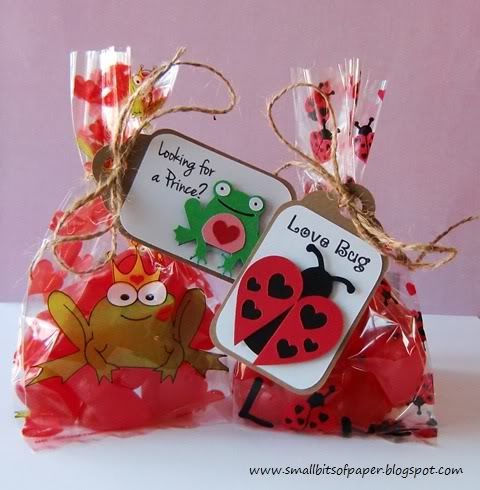
When I saw these treat bags at our local Bulk Barn, I couldn't believe my eyes!  It looks as though they were made to go with the Build a Valentine set from My Craft Spot!  Of course, I had to buy some and filled them with some heart-shaped jujubes. Both tags were cut using Wrap It Up and tied with some twine from my stash.  The tags were quick and easy to put together - but make for such a fun way to dress up the bags.


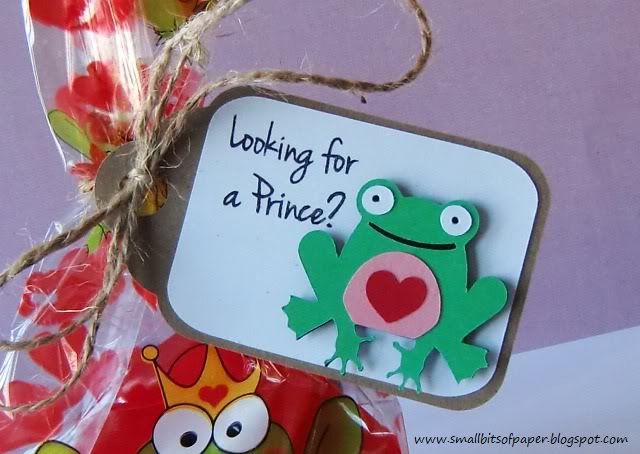
For the frog bag, I cut a little frog from Paisley and then stamped the "Looking for a prince?" sentiment from Build a Valentine.


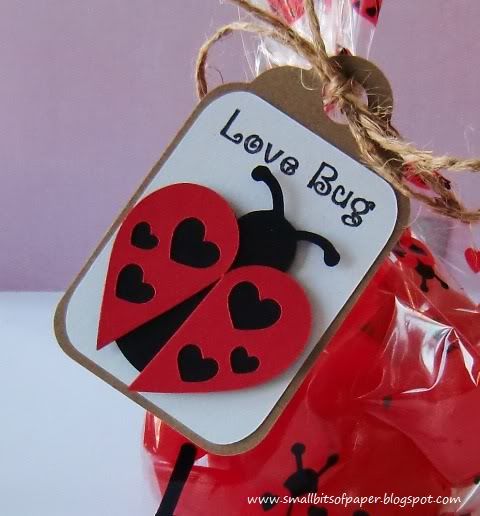
The base of the ladybird is from Walk In My Garden and I created the custom wings (to coordinate better with the ladybirds on the bag) using hearts from Create a Critter, cutting the larger heart in half.  The "Love Bug" sentiment is also from Build a Valentine.


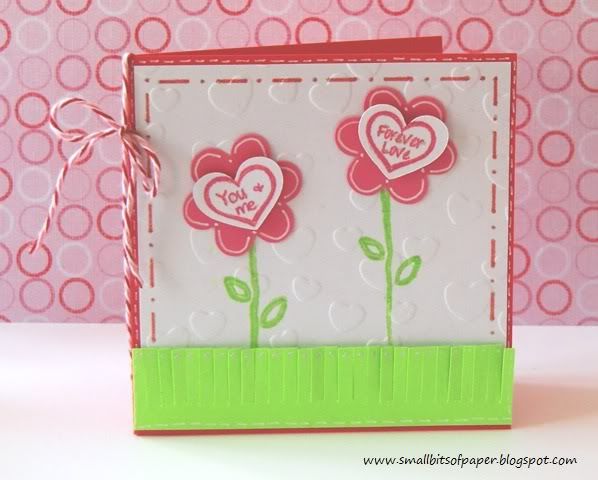
My final project is a little card made with conversation heart stamps from Build a Valentine.  I stamped the hearts on little hearts cut from Create a Critter.  The flowers were also cut from Create a Critter.  The stems are stamped and the mat embossed with a Hallmark embossing folder.  The grass was cut using Martha Stewart fringe scissors.  I did some doodling and also went over the sentiment and pink "stitching" and grass with a Stardust gel pen - so there's a nice glimmer in real life.  I finished everything off with some Divine Valentine twine from My Craft Spot.

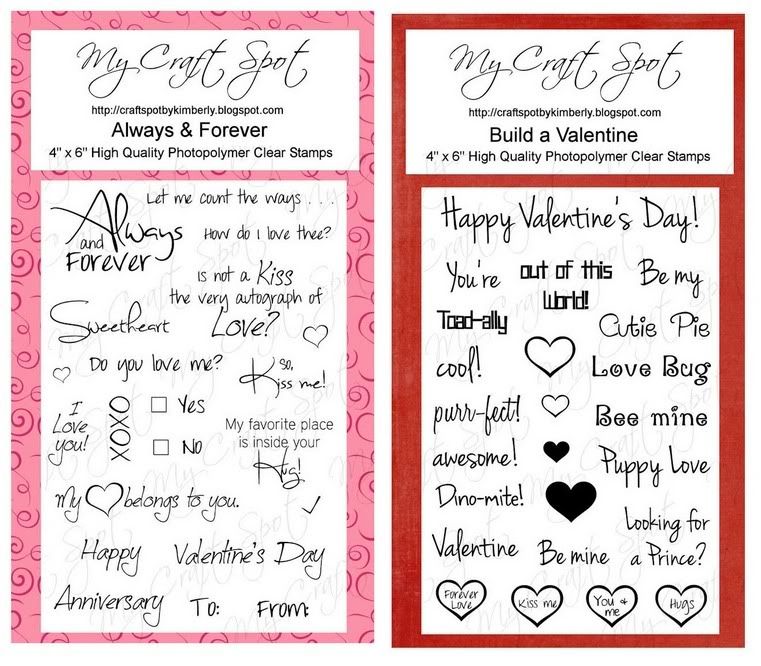
Here are the full sets of the stamps I've used for my projects above.  For many more project ideas and inspiration, head to My Craft Spot to see what Kimberly and the rest of the design team have been making!  I always love to see the different ideas and creations.

~ G I V E A W A Y ~
How would you like to win a My Craft Spot stamp set of your choice?  Kimberly has very generously donated a set to be given away on my blog.  All you need to do is:
  1. make sure you are a follower here at Small Bits of Paper
  2. leave a comment on this post.  
Don't forget to tell me which My Craft Spot stamp set is your favourite, in case you are the winner!  I will draw a name at random and announce the winner on Monday, so you have until Sunday at noon (EST) to enter.

~ W I N N E R S ~
Thanks to all of you who left such lovely comments last week's blog hops!  The winner of the $10 My Craft Spot gift certificate for the Cards for Kids Valentine's Day Blog Hop is Larelyn of Handmade from My Heart and the winner of the $10 My Craft Spot gift certificate for the Cricut Craftin' Grammy's Cricut Friends Blog Hop is Bobby of Bits & Pieces.  Congratulations Larelyn and Bobby!!  Please email me at smallbitsofpaper @ hotmail.com [remove spaces] so I can arrange to have your gift certificates sent to you.

*I am going to link up my Smarties tubes and Sweetheart tents at Decorate to Celebrate, where this week's theme is Valentine's Day Party.
61

May the Beauty of the Season Card

Monday, December 12, 2011
Welcome to another Fantabulous Cricut challenge!  I am especially excited about this week's challenge as My Craft Spot is the sponsor - a meeting of my two favourite challenge blogs!  Our theme is "Rolling in Ribbon" and we are challenging you to add ribbon to your project.  Please remember to use a Cricut cut as well.


I had very limited time for my project this week so kept things simple.  (Things HAVE eased up and I am slowly working my way through to pay some blog visits - but life is still very busy.  'Tis the season!)  I followed the same colour scheme I used last week too.  I cut the frame and shadow from Elegant Edges and embossed the cream cardstock with a Tim Holtz music folder.  The reindeer is from Gypsy Wanderings and I used Pop Dots to adhere it to the frame.  The top portion of the mat is embossed with a Sizzix snowflakes folder.  I also added two score lines to separate the embossed portion from the sentiment area.  The sentiment is a stamp from My Craft Spot's "Merry Christmas" set.  There are such lovely stamps and sentiments in that pack.  I also used some rich Scarlet Red crinkle ribbon from My Craft Spot and added a button from my stash.  To complement the button, I added some stardust Gelly Roll dots all around the reindeer.  I am happy with the way my card turned out and it's already been mailed off to wish a special couple a very Merry Christmas!


I'm sure you all have a stash of wonderful ribbon and now's the time to use it!  Head over to Fantabulous Cricut to link your project - and perhaps you'll be the lucky winner of some ribbon from My Craft Spot!

(I haven't entered a challenge in ages so am also going to link this up at Scrappy Moms Stamps where the challenge is Christmas.)
35

My Craft Spot Stamp Release Day Five

Friday, November 4, 2011
Welcome to the final day of the My Craft Spot Stamp Release Party sneak peeks!!  We'll wrap things up tomorrow with a fun blog hop - with prizes at EACH stop along the way!! But for today, the projects created by the My Craft Spot Design Team are available for view at My Craft Spot - with additional details provided on each member's blog.

Today's stamp set release is called "Winter Wonderland".  I made a quilted card using the "Frosty nights, quilted nights" sentiment.   
My square card measures 5x5 and each little square inside is 1.5x1.5.  The circles and squares were cut from George and Basic Shapes.   The little scalloped squares for the sentiment were cut from Mini Monograms.  I coloured each word individually in order to stamp the phrase separately to fit the squares.  I also added some sweet little snowflake stamps, also from "Winter Wonderland" in the same squares.  Today's stamp set contains three little snowflake stamps which are just perfect for creating backgrounds or adding additional detail to your projects!
Most of the images that I used for my card are from Christmas Cheer.  However, the little snowman is actually a circle from George and Basic Shapes with a hat from Gypsy Wanderings.  The snowman's face was stamped with a Peachy Keen stamp.  I added a mat which I embossed with a Cuttlebug Oriental Weave folder and also did some faux stitching around the edges.  I inked everything!  I finished things off by adding some vintage brown Baker's Twine from My Craft Spot to the middle of each of the snowflakes.
Don't forget to head to My Craft Spot to see the rest of the Design Team inspiration - and to enter there for your chance to win today's prize: Vintage Christmas Crinkle Ribbon!  And be sure to come back tomorrow for the blog hop.  EACH design team member will have one of this week's NEW My Craft Spot stamp sets to win!!

If you are interested in purchasing the new "Winter Wonderland" stamp set, ALL FIVE sets will be available for purchase at My Craft Spot TOMORROW!
19

Cupcake Birthday Card

Monday, August 15, 2011
This week's challenge at Fantabulous Cricut is a "Piece of Cake"!  We are challenging you to create a project with a cupcake or other baked good on it.  I decided to create an easel birthday card.
I used Gypsy Wanderings for the cupcake and frame.  I embossed the top and bottom layers of the cupcake and also embossed the white frame.  The little cupcakes at the bottom were punched with little punches from EK Success and the tops of each were also embossed.  The sentiment is from My Craft Spot.  (It's actually made to go on two lines but I stamped each word individually in order to have the sentiment on one line.)  The sentiment was then punched with a Stampin' Up window punch and shadow punch.  The inside was also punched with a Stampin' Up punch.  I added a button and some lovely pink baker's twine from My Craft Spot.
Please head to Fantabulous Cricut to check out the rest of the yummy projects created by the design team - and then link up your own cupcake (or other baked good).  
Well, I didn't end up going camping this past week.  Unfortunately, we had a huge storm here last weekend and our house was flooded.  Our entire lower level was destroyed and needs to be redone.  Fortunately, we lost nothing of any sentimental value AND our insurance is covering the costs (or at least a good chunk of them).  My husband did go camping with the boys but their trip ended up being cut short as well due to the young son of our good friends becoming very ill at the campsite.  He ended up being airlifted to the children's hospital in Toronto from the small hospital to which the ambulance had originally taken him.  It was a huge blessing that I was at home as I could be the contact person back here.  I am beyond delighted to report that the little guy seems to be recovering now and a CT scan has shown that there is no brain damage that has resulted from his experience.  We are all so incredibly thankful - and our tears of worry are now tears of joy.  However, I am absolutely drained at this point!!  I'm glad this is my holiday as I don't know what I would have done otherwise!!  We do have another trip planned for this week and I plan to do nothing!!

Don't forget that next week is the Stamp Release Party Week for My Craft Spot.  There will be prizes everyday and a blog hop on Friday - with prizes at each blog along the way!  There are also extra chances for blog candy each day to lucky followers who have the button below posted on their blogs too!

My Craft Spot

24

Discover Layout

Monday, May 30, 2011
This week, the challenge at Fantabulous Cricut is "Remember This".  We are challenging you to make something to remember a special person, time or anniversary.
I decided to make a layout to remember my youngest during a family holiday to England when he was two years old.   In the photo, he's on a play structure at a park, having climbed to the top to get a new perspective on things!  

Recipe:
My Mind's Eye - papers
New Arrival - giraffe
Hello Kitty Greetings and Love Language Tiny Hearts Cuttlebug folder - cloud (used as sand puddle)
Gypsy Wanderings - Discover
George and Basic Shapes - flag
My Craft Spot (Sweet Sentiments #2) - Treasure sentiment
EK Success, Stampin' Up, Martha Stewart, Michaels - various punches
Stampin' Up inks and white Gelly Roll pen
Please head over to Fantabulous Cricut to check out the great creations by the design team - and to enter this week's "Remember this" challenge!
18

Compass Valentine

Monday, January 24, 2011
This week at Fantabulous Cricut, we are challenging you to make use of your neglected cartridges.  I have a few cartridges that are still in their original packaging and (as I've mentioned before) one of my goals this year is to use what I've got.  However, for this challenge, I opted to go with My World - a cartridge that has been opened but used only once and is not yet on my sidebar's labels list.  Papers are designer cardstock from a set I got at Costco, a piece from Michaels' open stock, and metallic silver cardstock. 
(Sorry for the bit of glare.  The compass was SO difficult to photograph.)
I made this card for my husband.  I used My World to cut the compass.  I cut the shadow and two cuts of the main image using the blackout feature.  Then, on another layer, I hid the contours for the outer cuts and used a gel pen holder in my Cricut to draw the face of the compass.  I was a bit disappointed, and had to do this five times - still with rather unsatisfactory results as most contours were not being drawn.  I tried a number of different methods and finally ended up hand-drawing a good portion of the compass' face.  However, with all the inking on the card, I decided that the uneven lines added to the charm of the overall look.

I also cut a circle silhouette from George and Basic Shapes using the same metallic cardstock which I had used for the shadow.  I cut a full circle out of transparency too.  These were positioned over the top layer of the compass to give it the look of a glass cover.  I adhered these with small little pop dots.  The needle of the compass was cut from Gypsy Wanderings and I used markers and ink to colour a tiny brad to match.  I am so pleased with how the compass turned out!

I cut the heart and its shadow from a single piece of designer cardstock using George and Basic shapes and inked the edges to give some separation.  After adhering the heart to its shadow, I ran it through the Cuttlebug using the script embossing folder.  I did a bit more inking over the embossed script as well.

I also cut N, E, S, and W to use in the corners of the card and cut them from the same designer cardstock I had used for the compass needle and heart.  These were cut from Plantin' Schoolbook and were inked.  Initially, I had the N in the top left corner but then remembered my days of orienteering back at summer camp and realized that the needle of a compass always points north!  As the needle is pointing to the heart, I quickly changed things to make sure everything was just right.
I added a little heart charm tied to black hemp and positioned it behind the compass.  A few silver gems were also added to finish off the card.

For the inside of the card, I created the sentiment in Microsoft Word.  I did a bit of inking on the paper and finished things off by added some photo corners punched with an EK Success punch.
Head over to Fantabulous Cricut and show us what you can do with those dusty cartridges! I would love to see what you can create!

Challenges:
Crop Stop: square with a die cut
Frosted Designs: use transparency
***I'm also entering this at Sweet Magnolia Rose's first blog hop challenge.  Anything goes! Head on over and enter your project too!*** 
36
Former Design Team Member at My Craft Spot (2011-2015)
My Craft Spot


Powered by Blogger.
Follow on Bloglovin

Followers

>