Small Bits of Paper: Creative Memories

Showing posts with label Creative Memories. Show all posts

My Craft Spot Stamp Release Party - Blog Hop!

Saturday, January 11, 2014

Welcome to the My Craft Spot stamp release party blog hop! Today is the day that Kimberly is revealing her FIVE new stamp sets and FOUR new sets of metal dies!!  Products are available for purchase today too.  Woo hoo!!  Be sure to check everything out over at My Craft Spot!


For my project today, I put together a little gift bag of chocolates.  I used a variety of tools to create my topper: my trimmer, my Creative Memories Oval Cutting System and a NEW My Craft Spot Fancy Edges border die.  Be sure to check out this new die set as there are a SIX different border dies!!  I also used the Fancy Edges border die to create the border at the bottom of my bag.


To dress up my topper, I stamped one of the NEW Banner Sentiments on a NEW Ribbon Banners - Wavy metal die cut.  I then used one of the NEW Heart Borders metal dies to cut out the heart from cowboy print paper.  (It's hard to read, but the cowboy's hat reads, "For my sweetie".)  The little heart on the bottom trim of my bag was also cut with one of the NEW Heart Borders metal dies.  I inked everything!


I used coordinating paper to individually wrap each of the mini chocolate bars inside my bag.  I also dressed up the back of the topper too - and added a couple of little hearts cut with the NEW Heart Borders metal dies.  I'm so happy with the way the bag turned out!


I'm so pleased that Kimberly is giving me a Ribbon Banners - Wavy metal die set to give away on my blog!!  For your chance to win, simply leave a comment on this post.  I will announce the winner on Monday.

Now it's time to head over to visit the newest My Craft Spot designer - the incredibly talented Tanya of Nonna's Craft Corner.  Haven't her projects been amazing this week?!  I'll also provide you with the entire blog hop list so you don't miss any chances to join in all the fun!


Kate me!
67

My Craft Spot Release Party - Day Three

Wednesday, June 26, 2013
Welcome to Day Three of the My Craft Spot stamp release party!!  The team has all had fun with today's stamp set release:  Down on the Farm!   As soon as I saw the set, I knew exactly which stamp I wanted to use... probably because I howled with laughter when I first read it!!  I figured that if it made me laugh so hard, it would make a perfect pick-me-up for somebody having a rough ("ruff") time!


I created my box using slightly modified instructions from Split Coast Stampers (found HERE). Before assembling the box, I stamped around the kraft cardstock with a little paw-print from Studio G.  It's actually from a cat set, but who's to know?!  The fun paper is from DCWV's The Pets Stack and backed with some black cardstock.  The sweet little pup and hydrant are from Paper Pups - as is the bone at the top of the box.  


I created a dog tag using circles cut from my Creative Memories Custom Cutting System and stamped it with the hilarious sentiment from My Craft Spot's NEW Down on the Farm stamp set.  I finished everything off with a fire hydrant brad from my stash and some fabulous red jute string from My Craft Spot.


Be sure to check out the rest of today's Down on the Farm creations over at My Craft Spot.  While you are there, don't forget to leave a comment for Kimberly for your chance to win today's fabulous prize: the Best Witches to You stamp set!  

(*All items from this week's release will be available for purchase on Saturday.)


14

My Craft Spot Spring Stamp Release Party - Day 5

Friday, April 26, 2013
Welcome to Day 5 of the My Craft Spot Spring Stamp Release Party! I hope you've been having as much fun as the design team this week!  Tomorrow, we'll release pictures of ALL the new stamp sets and metal dies - plus, everything will be available for purchase.  For now, we are showcasing projects created with the NEW Feel Better Soon stamp set.  


I created a card with a sick little pup in bed from Paper Pups.  I used a variety of papers from my scrap caddy and rounded the corners with a Creative Memories corner rounder.  The little eyes on my pup were stamped with a Peachy Keen stamp and I used Glossy Accents on the nose and thermometer (part of which I had coloured with a red marker).  I popped the image on the card and used some My Craft Spot Blueberry baker's twine to use as a border between the two background papers.


Along the bottom of my card, I stamped a sentiment with the NEW Feel Better Soon stamp set, adding some tiny star buttons from Calico Cottage Crafts.

Head over to My Craft Spot to see the fun and fabulous creations made by Kimberly and the rest of the design team!  Leave a comment there today for your chance to win your choice of 5 colours of baker's twine!  And be sure to come back for tomorrow's blog hop - where there will be prizes at EACH stop along the way!  You'll also have the opportunity to purchase the NEW stamp sets and metal dies!
11

My Craft Spot Spring Stamp Release Party - Day 1

Monday, April 22, 2013
It's here!! Today marks the start of the week-long Spring Stamp Release Party at My Craft Spot.  Each day this week, we will be showcasing projects created with the NEW stamp sets and metal dies. Each day, Kimberly will be giving away a prize over at My Craft Spot.  All you need to do is leave her a comment over there!  And on Saturday, we'll end things off with a blog hop which will include a reveal of ALL the news stamps and dies - plus prizes at EACH stop along the way!  Everything will be available for sale on Friday too!


For today's project, I used stamps from the NEW Postage Stamps set and Postage Stamps metal dies.  The 5¢ stamp was cut using one of the new metal dies and I used three different stamps from the NEW Postage Stamps set inside it: the script, the red outline and the 5¢. I also used two other stamps from the new set on my card: the flourish at the bottom of my postcard and the XOXO. (The red heart is a stamp from the My Craft Spot Build a Valentine set.)


To create my 5x5 card, I cut some kraft cardstock for the base and then cut the corners with a Creative Memories corner cutter.  Patterned papers are from DCWV's Haberdash stash.  The Eiffel Tower is from Wall Décor and More.  I hand cut the postcard and stamped the outline and lines using a Prima stamp.  The red button is from a Martha Stewart die/emboss punch.  I finished everything off with a large black brad, a Stampin' Up key charm (given to me by my sweet friend and My Craft Spot design team sister, Ally of Rock Paper Cricut) and some fabulous black jute string from My Craft Spot.  Everything was inked with Tim Holtz distress inks too.


Please head over to My Craft Spot to see the rest of the amazing projects created by Kimberly and the My Craft Spot design team.  Don't forget to leave a comment over there for Kimberly for your chance to win a New Arrival stamp set!  I'll see you tomorrow with another project made with a new release!
  
17

Thank You Cards

Monday, January 14, 2013
Happy New Year!  It seems a bit late to be saying that now, but I haven't posted anything since December.  It was wonderful to have my daughter home for the holidays.  She went back to uni last weekend but I've seen her again already!!  My youngest had a hockey game near her on Saturday so we all went for supper together.  It was such a treat!

This week at My Craft Spot, the challenge is "Anything Goes".  This challenge is open to all but winners must use My Craft Spot stamps to qualify.


For my project, I created a set of Thank You cards.  I used Makin' the Grade for "you" (using the negative space on my card front) and then stamped above it with a stamp from My Craft Spot's Thank You stamp set.  


I embossed the top left corner with a little 2x2 Cuttlebug folder and added tiny pearls to the middle of each of the flowers.  I layered some Cosmo Cricket papers, punching a border with a Martha Stewart punch.  I then wrapped some wonderful Pumpkin Spice crinkle ribbon from My Craft Spot around the card.  Before popping the card front onto the card base, I layered a bit of the striped paper underneath.  I finished everything off by rounding the top corners with a Creative Memories punch.


Please head over to My Craft Spot to see the wonderful variety of projects created by the design team - and then link up your own project!

Have a wonderful week!
19

Some of my Best Friends are Flakes!

Tuesday, December 18, 2012
Hello friends!  I can hardly believe that there is only one week until Christmas!!  I still have some more baking to do but won't do that until next Sunday and Monday as there are some things that I prefer to have fresh for Christmas - and my freezer space is limited.  I tend to go overboard with my Christmas baking but nobody seems to complain!!

It's my turn to post a project at My Craft Spot today and I'm showcasing a card that I created for one of my best friends.  She LOVES snow.  A few months ago, I found some snowman tea towels with "Some of my best friends are flakes" written across them.  I picked them up for her - and then when Kimberly came out with the same fun sentiment on her new "Think Snow" stamp set, I knew that I'd be using it to make a coordinating card!!


I used Winter Frolic for the snowman and Elegant Edges for the frame.  I used a Peachy Keen stamp for the eyes.  The snowman's scarf is tied with some wonderful Caribbean crinkle ribbon from My Craft Spot.  I added a coordinating border made with a Martha Stewart punch.  I also did some embossing using the Cuttlebug Snowdots folder.


As I noted above, the fun sentiment is from My Craft Spot's "Think Snow" stamp set.  It's just perfect to use to spread a smile!  The little snowflakes are from the same set too!  The bottom corners of my card were rounded using a Creative Memories punch.

Have a fabulous day! Merry Christmas!
16

Wish Big Basketball Card

Tuesday, December 4, 2012
My husband celebrated a birthday last week.  I had originally planned to create a card for him doing something with a license plate (as one of his gifts was new license plates).  While doing a search of Cricut license plates, I came across a football card created by my sweet and talented blogging friend, Lee-Ann of Snappy Scraps. (You can see Lee-Ann's card HERE.)  I decided to scraplift her idea and created a basketball card.  I never did make a license plate card!


I used Basketball Solutions to create the oversized ball on this card, hand cutting it down to fit the 5x5 card base.  I used a Creative Memories corner rounder on the corners.  The basketball player is also from Basketball Solutions.  I used some silver metallic paper for the shadow - and used the same paper to cut a pennant using a Lacy Banners metal die from My Craft Spot


The orange circle around the sentiment was cut using one of the My Craft Spot Tiny Doilies metal dies.  The inner white circle was cut using a metal die from the same set.  The "wish BIG" sentiment is from My Craft Spot's Tiny Tags set.  I added a bit of Halloween baker's twine - also from My Craft Spot - behind the sentiment pennant.


I stamped inside my card too!  This time, I used a fun sentiment from My Craft Spot's Birthday Wishes set. 

Thanks so much for visiting me today.  Have a fabulous day!
13

Falling Leaves

Monday, September 24, 2012

Click HERE for this week's Fantabulous Cricut Challenge Blog post.

This week's challenge at My Craft Spot is Falling Leaves.  We are challenging you to create a project with at least one fall leaf on it.  


I used the new My Craft Spot Stampin' Around Fall stamp set to create the circular leaf border around my window frame.  I first cut paper to size and then used the Creative Memories cutting system to cut the circle out of the middle.  I used the Inkadinkado Stamping Gear set to line up the little orange leaves as I stamped my way around.  (Do the varied thickness of stamps, be sure to keep the cover of the stamping gear set in order to create a tool that can adjust for all your stamping needs.  I felt a bit like MacGyver as I had to get creative with plastic, pop dots and cellotape - but I did it!!)

The little squirrel is from Create a Critter.  The face is stamped with a Peachy Keen stamp.  I also added some orange faux stitching around the card frame. 


The sentiment is also stamped with the new My Craft Spot Stampin' Around Fall stamp set and I used the new My Craft Spot Tiny Doilies metal dies for the scalloped circle and sentiment ring.  These doilies are so easy to work with - and so pretty too!  Mine is popped on my card.  I finished things off with a few more leaves from a Martha Stewart punch.  

Please head over to My Craft Spot to see what the rest of the design team members have made for this week's challenge... and then link up your own Falling Leaves project for your chance to win this week's fabulous prize!


24

My Craft Spot - Fall Stamp Release Party - Day 5

Friday, September 7, 2012

Welcome to Day 5 of this year’s My Craft Spot Fall Stamp Release Party!!  Today, we are showcasing projects made with the NEW Happy Thanksgiving set. 


I used Creative Memories Cheerful Seasons as the inspiration for my card.  I took the circular tree, kept the trunk and switched out the circles for some Doodlecharms hearts.  Using My Gypsy, I also created a shadow for the tree.

I rounded the corners of my card base using a Creative Memories corner rounder.  I used My Mind’s Eye for the pattern papers and did lots of inking.  The little hearts at the base of the tree were punched with a little heart punch I picked up at Michaels years ago.


I finished off my card with one of the NEW My Craft Spot Happy Thanksgiving sentiments.  It’s perfect for a fall-themed love card!

Don’t forget that tomorrow is the My Craft Spot Fall Stamp Release Party Blog Hop!  Each design team member – and Kimberly – will be showcasing projects made with the NEW release projects and there will be prizes at EACH stop along the way.  So fun!!
19

Birthday Cards

Thursday, August 30, 2012
I'm so pleased to be showing you a couple of birthday cards that I recently made.  I'm highlighting them at My Craft Spot today as well.  It seems as though negative space is all the rage right now and I've been so inspired by the many cards I've seen that I decided to use the same technique on my cards.  It's quite an easy technique but one that really makes a statement.  Everybody seemed especially impressed with these two cards... and they really were quite simple to put together!  


I made the first card as an extra for my daughter's 18th birthday.  I used my paper cutter to cut the card base and patterned paper mat and then used my Gypsy to cut the top layer with George and Basic Shapes, with "18" cut out of the cardstock using Plantin SchoolBook.  Corners are all rounded with the Creative Memories corner rounder.  Once cut, I embossed the top layer using my Cuttlebug using the "Bloom Dots" folder.  I attached the top layer using pop dots to leave some space between the patterned paper and cardstock.


To finish things off, I cut a tiny tag and shadow from the My Craft Spot Tiny Tags metal die set and stamped it with a little sentiment from the My Craft Spot Tiny Tags 2 set.  I finished everything off with some Blueberry Blue baker's twine from My Craft Spot.


The second card was made for my daughter's boyfriend.  I used the same technique as I had used for Erin's card, but this time, cut the word "birthday" using Opposites attract.  The little balloons are from Celebrations and tied with Blueberry Blue baker's twine from My Craft Spot.

I finished the front of the card by using a stamp from My Craft Spot's Sweet Sentiments - Set #1, using some cellophane tape to cover the "birthday" portion of the stamp.  If you try this, just remember to remove the cellophane prior to stamping!  

Don't forget that the My Craft Spot Fall Stamp Release Party starts on Monday - and you are ALL invited!!  Check HERE for more details.

Also, I am giving away a $15US gift certificate to My Craft Spot.  Click HERE to enter if you haven't already!  
18

Fall Leaves

Monday, September 19, 2011
It's time for another challenge at My Craft Spot!  This week, the theme is "Fall Leaves".  Here in central Ontario, the leaves are just starting to change colour - thanks to the cooler temperatures we have been having.
I created my little scene using Campin' Critters, adding some extra little leaves cut from Create a Critter.  The card base was created by welding a frame from Elegant Edges (with thanks to my husband for hitting almost every Michaels in the Greater Toronto Area with me in order to find this cartridge!) and George and Basic Shapes.  The banner is a parenthesis from Plantin' SchooolBook, with the ends cut with a punch from Creative Memories, and stamped with two stamps from My Craft Spot's Happy Fall set.  I did some inking and some drawing and then finished everything off with some glorious My Craft Spot marmalade crinkle ribbon.

If you haven't checked them out already, please head to My Craft Spot to see the other "Fall Leaves" projects created by the rest of the design team.  Then link your own project to be eligible for this week's prize!

(Also, just a heads-up that My Cut Search is celebrating their one-year blogiversary this week.  Later this week, they will be offering special promo codes in their "News" section.  My Cut Search is a great way to find specific Cricut cuts.  Be sure to check it out!)
36

Father's Day Gift Bag

Monday, June 13, 2011
If you are looking for my Fantabulous Cricut Challenge #64 post, please click HERE.

The unthinkable occurred last weekend.  I was trying to get some crafting done but neither my Gypsy nor my Design Studio would recognize my Cricut!  I spent far too long trying to get things to work, with no success.  First thing Monday morning, I called ProvoCraft and am so impressed with the service I received.  By Friday, I had a new-to-me (refurbished) Cricut at my door.  It's not as pretty as my Pink Journey Cricut but it is on speaking terms with my Gypsy and Design Studio so I am happy once more!

This week at My Craft Spot, the challenge is "We Love You, Dad".  I don't have a father so I created something for my husband.  Even though it's fairly simple, it was a challenge for me as I've never created a project without my Gypsy or Design Studio.  (I made this earlier in the week, prior to the arrival of a fully functional Cricut.)  Once I figured out how to set the paper sizes, it was a piece of cake!

I used Car Decals for the image.  (I hand punched the eyes.  Although I love the adorable images on Car Decals, I'm not overly fond of the mismatched eyes.)  My husband is quite an athlete and participates in triathlons, plays on a soccer team and basketball team, and plays weekly games of squash.  I purchased him an odometer for his biking and running so wanted a bag to match the gift - and him!  I created a border with an EK Success punch to go behind the image.  I used Makin' the Grade for the font.  Makin' the Grade was one of the first handful of cartridges I owned when I had my first little Cricut and I used it ALL the time.  I really do like the font.  Plus, I thought it was such a good match with the My Craft Spot (Sweet Sentiments Set #2) "To" and "From" stamps I used for the tag.  I created the tag with a Creative Memories circle cutting system.  I finished things off with some tulle and ribbon.

Please head over to My Craft Spot to join this week's challenge!  There is a fabulous giveaway and some wonderful inspiration by the rest of the design team too!

*I am also going to enter this in the first challenge at Decorate to Celebrate.  It's a Father's Day theme, so my bag fits the bill.  My wonderful blogging friends, Rhonda and Amy, have started the new challenge blog, Decorate to Celebrate.  I encourage you to check it out if you haven't done so already!
42

Hugs Card

Monday, May 30, 2011
If you are looking for this week's Fantabulous Cricut Challenge Me Monday post, please go HERE.

It's all about cute critters at My Craft Spot this week. As felines are my favourite critters, I decided to create a card with a cat.  Last week, I saw the Cricut Lite Meow cartridge on sale at our local Walmart and figured that this challenge was a great excuse to pick it up!  As I tend to purchase my cartridges online (they are SO much less expensive this way, often a quarter of the price), it was quite a treat to pick one up and come right home to use it after purchase!
The main image on this card is from the Cricut Lite Meow cartridge and the fence and hill are from Wrap It Up. The fence was embossed using the Cuttlebug Distressed Stripes folder.  I used a floral stamp (manufacturer unknown) to create a pattern on the little girl's dress and her face was stamped with a Peachy Keen stamp. The little girl and her cute critter were popped. The scalloped mat is from Kate's ABCs. I embossed the kraft mat with an Indentz folder and used a Creative Memories corner rounder punch on the mat and card base as well. I inked everything and did some doodling too. To create my sentiment, I used a stamp from My Craft Spot's Sweet Sentiments Set #1. I also used some fabulous Raspberry Truffle crinkle ribbon from My Craft Spot, some embroidery floss and a button to complete the look of the card.  When I showed the card to my youngest, he exclaimed, "That looks just like Electra!" (our cat) which made me smile.

There are some other wonderful projects on display at My Craft Spot to provide inspiration for this week's challenge.  Please go and check them out!  Then create your own cute critter project to link up in order to be eligible for this week's wonderful giveaway.  Also, Kimberly announced last week that My Craft Spot is now selling baker's twine from The Twinery too.  The colours are so bright and fun!
28

Rejoice Card

Wednesday, February 16, 2011
Yesterday, I received some wonderful news.  A friend with cancer just learned that she is in remission - prior to treatment!  As soon as she gave me the news, I dropped everything to make her a card.
I knew right away that I wanted to use "Rejoice" as my sentiment, but don't have any stamps that say that!  I did an online search and found just the right font used on another graphic so did some editing, stretching, and colour changing and came up with something I liked.  As my sentiment was computer generated, I then looked for a digi-frame in order to have the ink match perfectly.  I was delighted to discover Bird's Cards where there are all sorts of freebies - including the PERFECT frame for my sentiment and the look for which I was going.  I cut the oval frame and mat with my Creative Memories cutting system and also used Stampin' Up punches for the border, the corners, and the scalloped circles above and below the frame.  I embossed the white mat with my Cuttlebug Textile Texture folder.  To finish things off, I used some Chocolate Truffle crinkle ribbon from Kimberly at My Craft Spot and a button from my stash.  This is the first time I've used crinkle ribbon and I LOVE it!!  I am quite "ribbon challenged" (or just my own worst critic!!) and crinkle ribbon does not need to be even so is incredibly easy to work with.  It lends itself quite nicely to vintage creations but I have also seen Kimberly use crinkle ribbon with contemporary cards as well. 

And some more great news for one lucky follower:  Random.org chose #29 - Teri - to win my prize package for the Fantabulous Cricut "Share the Love" crawl.  Congratulations, Teri!  (Teri, please send your contact information to smallbitsofpaper at hotmail dot com and I will get your prize out to you.  You have one week to claim your prize.)
15

Guest Designer at Papercraft Star

Wednesday, January 19, 2011
I am just thrilled to be the guest designer at Papercraft Star for this week's challenge!  It's a fun one - to use some or all of the colours below to create your project and include at least two of the following elements:
    * Ribbon
    * Stamped Image
    * Embossing
    * Die Cut
Here are the colours:
I decided to make a gift set for my niece.  The set includes a little gift bag, a gift card holder and a birthday card.  I found some great instructions for the bag at Scrapbook Eden.  All of the items were created using regular cardstock.  I used various embossing folders, some glitter and my white gel pen to spruce things up.  The word "Sweet" was cut from Create a Critter and manipulated to curve a bit more in order to fit around the circle.  The circle itself was cut using my Creative Memories cutting system.  I also added some gems and a ribbon to finish things off. 

Here's a closer view of the bag...
...the top of the bag...
...and the gift card holder.

I'd also like to thank Kelly at Sandcastle Stamper and Dana at Imagine What You Could Do for the Stylish Blogger Award!  Thank you so much!
Part of this blog award is that I am required to tell you eight things about myself:
  1. I always carry tissues with me.
  2. I love to eat red licorice and red jujubes (as long as they are not cherry flavoured)
  3. I make up crazy names for everybody I love.  I rarely call my husband and children by their real names.
  4. Before deciding to work toward my Master of Education, I studied forensic science.
  5. I once earned an overall grade of 100% in post-secondary physics - although I can hardly remember a thing now!! 
  6. I regularly volunteer at my youngest son's school.
  7. I speak English and French.
  8. I am really starting to feel that I would like to work outside the home again.  (I'm currently self-employed and work from home, but it gets lonely sometimes)
I would like to pass this award to some bloggers that I've recently discovered:
April at Stampwilly Designs
Angie at Scrappin_Diva
The Sleeoy Stamper at Stamping While They Sleep
Monica at Simply Cricutting

and Kimberly Ann at Paper Loves Glue
18

CropStop Challenge - Valentines for My Boys

Tuesday, January 11, 2011
I was so excited to read that CropStop has started their own challenge blog.  The first challenge is based on a sketch by Gloria Stengel (see below).  I actually made two cards - valentines for my boys.
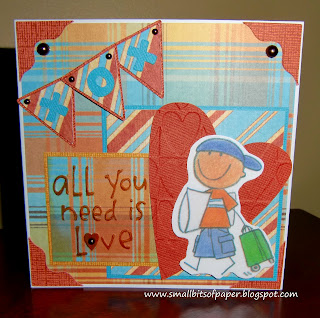
The first card is for my youngest.  Although the image (a Me and My Big Ideas sticker) might seem a bit odd for a valentine, it just fits my youngest perfectly.  He loves to visit and go places - and is only 8 so still needs reminders of what and what not to pack.  I thought the embossed sentiment (Cuttlebug) tied in perfectly and I coloured it to make it stand out a bit more.  I used patterned papers from the DCWV Pet Stack and cardstock is from a Textura pack.  I used Celebrations for the banner, with the XOX created with Mickey Font.  The corners were cut with Jasmine.  I also cut a heart with Jubilee and embossed it with a Cuttlebug folder.  I added a few half beads too.

(I will also enter this card at The Cuttlebug Spot, where this week's projects are to be inspired by a song.  I was disappointed as I missed the challenge last week - but just realized that it has been extended so I can join in! I was playing the Beatles as I made this - and also YouTubed the wedding scene from Love Actually.)
The second card is for my middle guy.  He loves anything with fur, fins, feathers or scales!  I used papers from the same stacks, but used an EK Success punch for the corners.  I made the banner the same way I did the card above.  The background mat was embossed with another Cuttlebug tiny hearts folder and the little pup silhouette and shadow were cut with Paper Pups.  The sentiment is Studio G and I used my Creative Memories cutting system to cut it out, along with a shadow.  I also used an EK Success border punch for one of the mats and frames.  Half beads were added to this card as well. 
I'm so pleased with how these cards turned out!  It feels good to have the first two done!
13
Former Design Team Member at My Craft Spot (2011-2015)
My Craft Spot


Powered by Blogger.
Follow on Bloglovin

Followers

>