Autism Awareness Card

Monday, January 31, 2011
This week is all about supporting your cause at Fantabulous Cricut. We are challenging you to make a project in honour of a cause near and dear to your heart (i.e. breast cancer awareness, autism, MADD, etc.).
I created my card to support Autism Awareness.  I am incredibly involved in the autism community.  I am a member of the Ontario Autism Association and attend meetings and volunteer with our local chapter.  In addition, much of the research focus of my academic studies relates to students with ASD (autism spectrum disorder).    But, most importantly, I am the parent of a child with ASD.  My son truly is a blessing and a gift - and has many gifts of his own.  He is absolutely brilliant and scores years ahead of his peers on academic testing.  He has an incredible sense of humour and is honest and dependable.   And he plays along when I insist that I am only 21!  I would not be complete without him in my life and I thank God each day for allowing me the privilege of being his mother. 

The image on my card is from the "Together for Autism Campaign" (which I've just discovered has ended, unfortunately).  I printed it onto heavy cardstock and then hand cut it out.  The children have puzzle pieces on their shirts, and I've also added an additional puzzle piece cut from My Community, as the puzzle piece is the universal symbol of autism.  It represents the puzzling condition of autism and also how individuals on the spectrum just don't seem to "fit in" with the rest of society. 

The frame and shadow behind the image were cut from George and Basic Shapes.  The orange layer was run through the Cuttlebug with a Spots and Dots folder.  The background mat was embossed with a Cuttlebug Measure by Measure Ruler border folder and then I used my Martha Stewart score board to extend some of the lines.  I added some gems to finish things off.

Please join us at FCCB this week and create something to support a cause that means something to you. 

***Don't forget:  Next Monday begins our "Share the Love" Blog Crawl at Fantabulous Cricut.  With lots of project inspiration and prizes along the way, this is one event you are not going to want to miss!***

(Also entered at Crop Stop.)
18

Compass Valentine

Monday, January 24, 2011
This week at Fantabulous Cricut, we are challenging you to make use of your neglected cartridges.  I have a few cartridges that are still in their original packaging and (as I've mentioned before) one of my goals this year is to use what I've got.  However, for this challenge, I opted to go with My World - a cartridge that has been opened but used only once and is not yet on my sidebar's labels list.  Papers are designer cardstock from a set I got at Costco, a piece from Michaels' open stock, and metallic silver cardstock. 
(Sorry for the bit of glare.  The compass was SO difficult to photograph.)
I made this card for my husband.  I used My World to cut the compass.  I cut the shadow and two cuts of the main image using the blackout feature.  Then, on another layer, I hid the contours for the outer cuts and used a gel pen holder in my Cricut to draw the face of the compass.  I was a bit disappointed, and had to do this five times - still with rather unsatisfactory results as most contours were not being drawn.  I tried a number of different methods and finally ended up hand-drawing a good portion of the compass' face.  However, with all the inking on the card, I decided that the uneven lines added to the charm of the overall look.

I also cut a circle silhouette from George and Basic Shapes using the same metallic cardstock which I had used for the shadow.  I cut a full circle out of transparency too.  These were positioned over the top layer of the compass to give it the look of a glass cover.  I adhered these with small little pop dots.  The needle of the compass was cut from Gypsy Wanderings and I used markers and ink to colour a tiny brad to match.  I am so pleased with how the compass turned out!

I cut the heart and its shadow from a single piece of designer cardstock using George and Basic shapes and inked the edges to give some separation.  After adhering the heart to its shadow, I ran it through the Cuttlebug using the script embossing folder.  I did a bit more inking over the embossed script as well.

I also cut N, E, S, and W to use in the corners of the card and cut them from the same designer cardstock I had used for the compass needle and heart.  These were cut from Plantin' Schoolbook and were inked.  Initially, I had the N in the top left corner but then remembered my days of orienteering back at summer camp and realized that the needle of a compass always points north!  As the needle is pointing to the heart, I quickly changed things to make sure everything was just right.
I added a little heart charm tied to black hemp and positioned it behind the compass.  A few silver gems were also added to finish off the card.

For the inside of the card, I created the sentiment in Microsoft Word.  I did a bit of inking on the paper and finished things off by added some photo corners punched with an EK Success punch.
Head over to Fantabulous Cricut and show us what you can do with those dusty cartridges! I would love to see what you can create!

Challenges:
Crop Stop: square with a die cut
Frosted Designs: use transparency
***I'm also entering this at Sweet Magnolia Rose's first blog hop challenge.  Anything goes! Head on over and enter your project too!*** 
36

Game Controller Card and Box

Saturday, January 22, 2011
My son has a birthday party to attend for one of his classmates.  When I first saw "Wrap It Up", I immediately noticed the game controller and thought it would be perfect to use on a boy's card.
I created the card at 3.5 inches.  As I did the base in black, I wanted a lighter colour for the inside on which to write.  I used the main image and manipulated it to fit inside the card.  I used a Cuttlebug Koi embossing folder for the handles of the controller.  Initially, I had cut the front of the card at 3.5 as well, but did not like the look so manipulated the image in order to have a bit of a frame around it and re-cut it.  I then ran it through the Cuttlebug using a Polka Dots embossing folder.  I hid some contours when cutting out the buttons of the controller and then cut the little bits out separately in red.  I used Glossy Accents on the buttons too.
I cut the box at 6.75 inches and also ran it through the Cuttlebug using a Polka Dots embossing folder.  The controller was embossed using a Swiss Dots folder.  I added Glossy Accents to the buttons on the box as well.  I hand cut a piece of coordinating red cardstock to go behind the window, first embossing it with a Happy Birthday folder.

My children were so excited about these and were pretending to use the card as a controller!  As I was waiting for the Glossy Accents to dry, my son received a call inviting him to attend another party next weekend.  His friend is renting a video game store for the entire night so the boys will be able to play to their hearts' content.  I think I will make another set for that party as well.  It seems fitting!

I will enter this project at The Cuttlebug Spot, where this week the inspiration challenge is children's games and at My Time to Craft where the challenge is spots and dots.
19

Core'dinations Contest

Wednesday, January 19, 2011
Core'dinations is having a contest and giving away the paper packs listed above.  (You get to choose your favourite.)  Click here to enter!
*The offer is good in Canada and the US.  50 packs are being offered!
7

Guest Designer at Papercraft Star

I am just thrilled to be the guest designer at Papercraft Star for this week's challenge!  It's a fun one - to use some or all of the colours below to create your project and include at least two of the following elements:
    * Ribbon
    * Stamped Image
    * Embossing
    * Die Cut
Here are the colours:
I decided to make a gift set for my niece.  The set includes a little gift bag, a gift card holder and a birthday card.  I found some great instructions for the bag at Scrapbook Eden.  All of the items were created using regular cardstock.  I used various embossing folders, some glitter and my white gel pen to spruce things up.  The word "Sweet" was cut from Create a Critter and manipulated to curve a bit more in order to fit around the circle.  The circle itself was cut using my Creative Memories cutting system.  I also added some gems and a ribbon to finish things off. 

Here's a closer view of the bag...
...the top of the bag...
...and the gift card holder.

I'd also like to thank Kelly at Sandcastle Stamper and Dana at Imagine What You Could Do for the Stylish Blogger Award!  Thank you so much!
Part of this blog award is that I am required to tell you eight things about myself:
  1. I always carry tissues with me.
  2. I love to eat red licorice and red jujubes (as long as they are not cherry flavoured)
  3. I make up crazy names for everybody I love.  I rarely call my husband and children by their real names.
  4. Before deciding to work toward my Master of Education, I studied forensic science.
  5. I once earned an overall grade of 100% in post-secondary physics - although I can hardly remember a thing now!! 
  6. I regularly volunteer at my youngest son's school.
  7. I speak English and French.
  8. I am really starting to feel that I would like to work outside the home again.  (I'm currently self-employed and work from home, but it gets lonely sometimes)
I would like to pass this award to some bloggers that I've recently discovered:
April at Stampwilly Designs
Angie at Scrappin_Diva
The Sleeoy Stamper at Stamping While They Sleep
Monica at Simply Cricutting

and Kimberly Ann at Paper Loves Glue
18

Thanks for OWL You Do

Tuesday, January 18, 2011
As soon as I saw the challenge at Jitterbuggin', I knew exactly what I wanted to do. We had to use a favourite Cricut bird and include some pink, and incorporate them into the sketch provided.  I've had the Stampin' Up Picture This set since last spring and have wanted to use the "Thanks for OWL you do" sentiment.  It worked perfectly for this challenge - so I finally opened up my stamp set and made use of it!  I'm really trying hard this year to use the things I've got.  I have too many unopened and unused items.
The circles on my card were cut from George and Basic Shapes.  I cut three circles - two solids and one silhouette.  The patterned papers are from DCWV's Spring Stack (I can't wait for spring!) and the cardstock pieces used were all from my scrap folder.  The owl was cut at 2 inches from Paisley and I ran the top layer through the Cuttlebug, using the argyle folder.  I then cut a branch from Create-a-Critter and embossed the leaves with a small butterfly folder.  I punched the sentiment with a Stampin' Up punch and also added another flower just like the one on the owl's wing, but with the colours reversed.  I popped the owl and branch as well.  I added some doodling and a couple of gems and added some Glossy Accents to the eyes too.

Here's the sketch:
16

Thank You Card

Monday, January 17, 2011
I made this card for the second Crop Stop challenge - to use stickles!  I have a number of bottles of stickles but don't use them as often as I should.  Perhaps I should move them down from the top shelf of my wall cabinet!

I used designer papers from K&Company for most of this card.  I used two different stamps from Stampin' Up's Fast and Fun Notes, interchanging the sentiment with the image.  I added some Ranger and Tim Holtz stickles to the butterfly (I mixed two colours).  I FINALLY used my Nestabilities to cut out my stamped image as well as a frame.  It's the first time I've used them despite owning them for ages!  The border was created with a Martha Stewart punch.  I also followed Kim Duran's tutorial at Paper Loves Glue and Papercraft Star to create the little tissue flower.  I'm so pleased with how it turned out!  I added some ribbon around the border and also created a little bow.  I punched some photo corners with my EK Success punch and added some half pearls in a few spots.  I also did a fair bit of inking on the card as I worked along, using some Tim Holtz tea dye distress ink and a little Tsukineko dauber that I received from Saundra at Luv Scrapping Together.  She sent me some wonderful blog candy at Christmastime.  (Thanks Saundra!)  To finish things off, I sprayed the card with a vanilla shimmer Smooch Spritz from Stampin' Up.
 I will also enter this card at Glitterbabe's Challenge (where anything goes), Pile It On (where anything goes here too), and also at Wee Memories (where the challenge is to use ribbon).
18

Crazy Little Thing Called Love - a layout

Saturday, January 15, 2011
I've spent a huge chunk of the day working with my daughter as she finished up a culminating task for one of her courses.  She had to prepare a scrapbook of information, so I've been helping her cut titles for the various pages.  Tomorrow, we'll add a few more cuts to embellish some of the pages.  It's been fun for both of us!
I also worked on this layout for the challenge at Serenity Scrappers where we were to create a layout with red and gold and also incorporate three brads.  I have had the basic layout designed for a few days - but without a title.  It changed too many times to count.  This morning, though, I woke up singing Queen's Crazy Little Thing Called Love and knew that was the title for my layout!

This layout really was a challenge for me.  I seldom do layouts and wasn't happy with the different ideas I had for using the brads.  Finally, the little Stampin' Up tag in the bottom corner, on which I wrote the date, seemed to work just right.

I used George and Basic Shapes for the large circle.  Most of the title was created with Tear Drop, using real size.  "Love" was cut with Create a Critter.  I also punched out a few more hearts and did some embossing with my Cuttlebug.

I've not been able to get to many blogs over the past couple of days but hope to find some time in the next day or two to do some visiting!!
17

Be Aware of Wonder

I made this card using a sketch from Papercraft Star.  The frame and wheel were cut from Accent Essentials and I used paper from a DMD kit that was sent to me from April at Stampwilly Designs.  I won all sorts of wonderful blog candy from here - including the vellum sentiment which I used on this card as well.  The scalloped border was cut from Holiday Cakes and the corners were punched with an EK Success photo corner punch.  I finally used my Cuttlebug clockworks embossing folder too!  The little circles were punched with a Stampin' Up Itty Bitty circle punch.  My brads were not quite the right colour, so I used a Sharpie to fix that!  I also used some coloured cellophane to tie everything together.

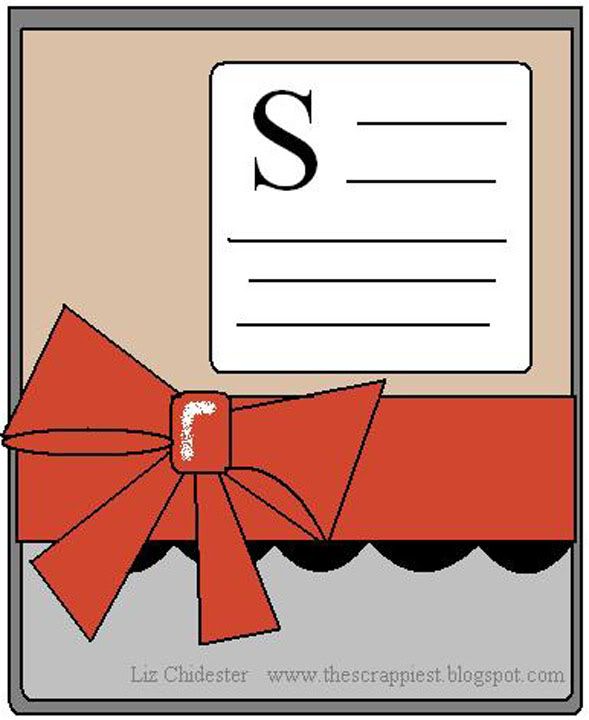
Here is the sketch I used:
I made this card to tuck in with my husband's lunch one day.  I'm pretty sure he knows it, but I like to remind him that I love him.
9

Baby Boy Card - CropStop Creative Team Call

Wednesday, January 12, 2011
A former student of mine just had a baby boy.  I made this card for her.

The patterned papers are Stampin' Up and the cardstock is Textura.  The top mat is embossed with a Cuttlebug folder.  The bear is from Doodlecharms and I drew his mouth with a pale blue Marvy marker.  The little circles in the bottom right were cut with George and Basic Shapes and the heart in the centre is a punch from a bin at Michaels.  The little tag was also cut with George and Basic Shapes and the letters were cut with Nursery Rhymes.  I embossed the little tag with a Cuttlebug butterfly folder*.  The little border was punched with a Stampin' Up border punch.  I added some gems and ribbon to complete the card.

Below is the sketch on which my card is based.  I have sent it in as part of the CropStop Creative Team Call.  For more information on the call, click here.
*The butterfly folder is part of a Cuttlebug die/emboss set which I purchased from CropStop.  I really wanted to use something I'd purchased from CropStop on my card.
14

CropStop Challenge - Valentines for My Boys

Tuesday, January 11, 2011
I was so excited to read that CropStop has started their own challenge blog.  The first challenge is based on a sketch by Gloria Stengel (see below).  I actually made two cards - valentines for my boys.
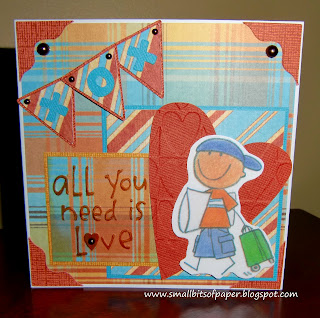
The first card is for my youngest.  Although the image (a Me and My Big Ideas sticker) might seem a bit odd for a valentine, it just fits my youngest perfectly.  He loves to visit and go places - and is only 8 so still needs reminders of what and what not to pack.  I thought the embossed sentiment (Cuttlebug) tied in perfectly and I coloured it to make it stand out a bit more.  I used patterned papers from the DCWV Pet Stack and cardstock is from a Textura pack.  I used Celebrations for the banner, with the XOX created with Mickey Font.  The corners were cut with Jasmine.  I also cut a heart with Jubilee and embossed it with a Cuttlebug folder.  I added a few half beads too.

(I will also enter this card at The Cuttlebug Spot, where this week's projects are to be inspired by a song.  I was disappointed as I missed the challenge last week - but just realized that it has been extended so I can join in! I was playing the Beatles as I made this - and also YouTubed the wedding scene from Love Actually.)
The second card is for my middle guy.  He loves anything with fur, fins, feathers or scales!  I used papers from the same stacks, but used an EK Success punch for the corners.  I made the banner the same way I did the card above.  The background mat was embossed with another Cuttlebug tiny hearts folder and the little pup silhouette and shadow were cut with Paper Pups.  The sentiment is Studio G and I used my Creative Memories cutting system to cut it out, along with a shadow.  I also used an EK Success border punch for one of the mats and frames.  Half beads were added to this card as well. 
I'm so pleased with how these cards turned out!  It feels good to have the first two done!
13

Fantabulous Cricut Challenge #42 - Winter Warmies

Monday, January 10, 2011
This week at Fantabulous Cricut, the challenge is "Winter Warmies".  I don't know about your neck of the woods, but I don't leave the house these days without a hat, mittens and scarf!  Even then, it's still too cold for my liking.
I made this card using Holiday Cakes to cut the mittens.  I used a felt cardstock paper which I then embossed using the Cuttlebug Snow Dots folder.  I also cut a shadow for the mittens and faux stitched on them with a white Signo pen.  The white mat was scored at 7/8 of an inch and 1 inch from the bottom with my Martha Stewart score board.  I then used the Cuttlebug Snow Dots folder on the top portion of the mat and stamped "warm and cozy" on the bottom with a portion of a Studio G stamp which I had coloured with a blue marker from Marvy.  (I did it this way as the sentiment is framed but I did not wish to use the frame on my card.)  Once stamped, I went over the sentiment with a Stardust Gelly Roll pen for some added glitter.  I also used the pen to make dots in the centre of all the embossed snowflakes and did some faux stitching around the entire card.  To finish things off, I added some white crafting boa to the cuff of the mittens.  The mittens are popped with my smallest Pop Dots as I wanted just a touch more dimension.   I just love the texture of the mittens with the embossed felt cardstock.  They could almost be real!

Please come and join us at FCCB.  We'd love to see your "Winter Warmies" creations!!

*I'm also entering this card at Made By Momo where the challenge is  is all about snow!
17

Choose to be happy

Saturday, January 8, 2011
I recently watched a fantastic video on cutting vinyl with the Cricut and have been going crazy!  Before Christmas, I had snowflakes everywhere and have also cut vinyl to label all sorts of my crafting items (which never leave the house!).  My husband has been teasing me, saying that he's very thankful that he won't get his Expression mixed up with mine (like he even has one!).

The challenge at Papercraft Star this week is to create a project using a New Year's resolution as inspiration.  I've been working hard at exercising more in order to loose a bit of weight by June - but that seems somewhat superficial.  Although I am generally a joyful person, there are times when I am in my office, working alone, that I can be rather unkind to myself when I make a mistake.  In all circumstances, I am given a choice to be happy or not.  I choose to be happy - and for those times when I need a reminder, I have created this wall art to remind me of the choice to make.  It is positioned directly above my laptop screen so I can see it when I am working. 

To create this message, I used Gypsy Font for the word "CHOOSE" and Nursery Rhymes for "to be happy".   Vinyl is WallPOPS. 
12

Thank You Card with Mulberry Paper

Tuesday, January 4, 2011
I was delighted to receive a pack of mulberry paper in all sorts of colours for Christmas.  My aunt shipped them to me from England.  I made a set of thank you cards using a strip of yellow mulberry paper along the bottom.  (I have the most difficult time with colours being accurate in my photos.  The paper really is a soft shade of yellow and matches the yellow stripes of the patterned paper.)  The other papers used were from a pack I got at Costco a couple of years ago.
The T-H-A-N-K signs were cut from George and Basic Shapes and I used Jubilee for the Y-O-U which I welded together.  I used an EK Success punch for the photo corners and the SO much sentiment and punch are Stampin' Up.  I inked the edges of everything (except the mulberry paper) and highlighted all the letters with a Star Dust Gelly Roll pen.  To finish things off, I added a Prima flower with a gem.  I've had these flowers for ages and never used them but think they are just the right touch for these cards. 

I'm now officially finished all my Christmas thank you cards - creating them AND writing them.  Later today, I'll be making a trip to the post office to send them on their various ways!

Challenge entered:
Creative Inspirations: Use something new on a project
15

Thanks Snow Much Card

Monday, January 3, 2011
Happy New Year!  I hope you all had a lovely holiday.  We had a wonderful time here and are still off until later this week.  We've been quite busy over the break so it will be quite nice to have a few days at home to recuperate before getting back into the swing of things.

The weather the past few days has been quite mild and much of our snow has melted due to rain.  That didn't stop me from participating in this week's Fantabulous Cricut "snowy delights" challenge though!  We are challenging you to use your Cricut to make something with a snow theme.
I made a number of these cards to send as thank you notes for gifts I received for Christmas.  I used a Martha Stewart punch-around-the-page set to create the little white mat.  I cut a smaller piece of white cardstock and embossed it with a Sizzix snowflake folder to place on top of the mat.  To make the little tag, I used two different stamps.  I added some Glossy Accents to the "snow" on the stamped sentiment.  I then used a Stampin' Up punch to make the top of the tag and added some ribbon.  The large green snowflake was cut from Very Merry Tags (hiding the contours of the actual tag).  I then heat embossed it with UTEE.  (The colours match better in real life!)  The patterned paper is from DCWV's Holiday Stack.  I used a Creative Memories corner rounder punch for all the corners. 

I wish you all the best for the New Year.  May each one of you be richly blessed with what 2011 has to offer.
11
Former Design Team Member at My Craft Spot (2011-2015)
My Craft Spot


Powered by Blogger.
Follow on Bloglovin

Followers

>