Small Bits of Paper: Wrap It Up

Showing posts with label Wrap It Up. Show all posts

My Craft Spot Mini-Release Day 1 - Rolled Flowers Metal Dies

Thursday, May 1, 2014

We're having a mini-release at My Craft Spot!!  Kimberly is releasing two new sets of must-have metal dies - and both sets are available immediately!  Today, we are showcasing projects created with the new Rolled Flowers metal dies.


For my project, my daughter and I created some little favour boxes for the table.  Each box was made using Wrap It Up and decorated with a border created with the Fancy Edges metal dies.  I then created some pretty little flowers using the larger of the two dies in the Rolled Flowers metal dies set. 


I finished things off with a little sprig punched with a Martha Stewart punch.  Actually, I suppose I really finished things off with two little chocolates tucked inside each box!!


If you haven't already done so, be sure to visit My Craft Spot to see the rest of the design team creations.  PLUS, Kimberly has some fabulous prizes to give away.  Winners will be randomly selected from one of the design team blogs - so the more comments you leave, the more chances you have to win!

Day 1 Prize:

Gift Certificate - $15

Day 2 Prize:

Gift Certificate - $15

And an extra prize chosen from all customer orders over the two days of this mini-release:

Gift Certificate - $20

16

My Craft Spot Fall Stamp Release Blog Hop!!

Saturday, September 8, 2012
Great news!!  The My Craft Spot Fall Stamp Release stamp sets and metal dies are available for purchase TODAY!!  Plus, today you get the full reveal to see all the wonderful sentiments and shapes - as well as a full look at the fabulous new die set!!  You'll see pictures of everything at the bottom of this post.

Kimberly has very generously offered EACH design team member an item from new release to give away during this hop.  I'll be giving away the Best Witches to You stamp set.  It's got lots of fun sentiments!  All you need to do is leave a comment on this post and be a follower of my blog.  Winners will be announced this Monday so you have until Sunday night to enter.


I decided to make a treat bag for the hop.  The bag is cut from Wrap It Up and the spider web is from Paper Doll Dress Up.  I used my Gypsy to hide the outermost contour of the web in order to have the web design on the bag (and not cut right out altogether).


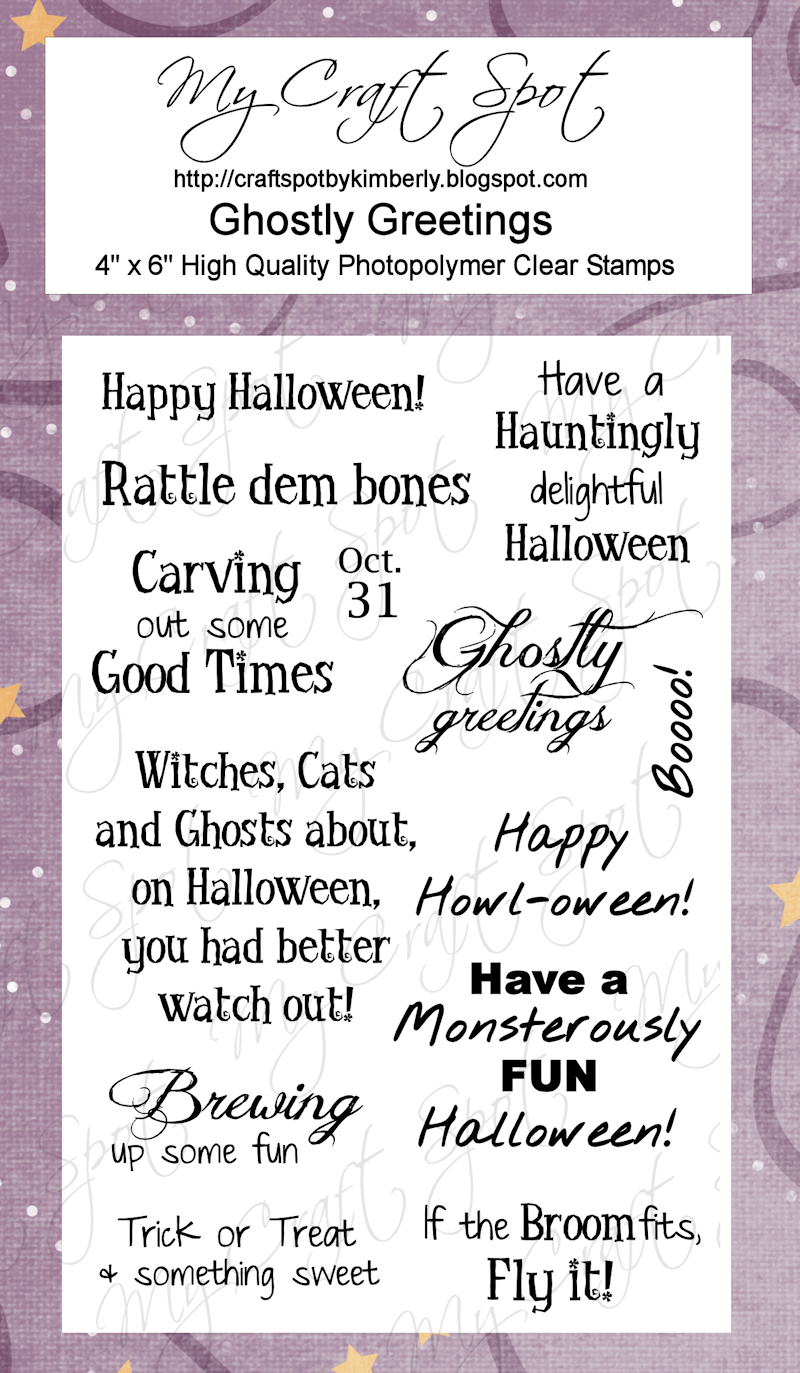
I used a Martha Stewart punch to create the border at the bottom of the bag.  The rosette was cut from the same punch.  (I got this idea from my design team sister, GiGi.  Click HERE for a link to her post.)  Over the rosette, I layered three different cuts from the NEW My Craft Spot Tiny Doilies metal dies.  The white layer is stamped with a little spider from the NEW My Craft Spot Stampin' Around Fall set.  I hand cut the little tag and stamped it with a sentiment from the NEW My Craft Spot Ghostly Greetings set.  I then finished everything off with a bit of Halloween baker's twine... from My Craft Spot!  


You can check out all the new sets below - and then hop on over to visit the incredibly creative Amber at My 3 E Scrapbooking.  When you are done the hop, remember that you can go to My Craft Spot to order the new sets today!!

  
Here are the new stamp sets!
Aren't they fabulous?!

This set was designed by our very own Robin!  


Robin also designed a set of metal dies to go with the Stampin' Around Fall Stamp Set! 


Here are 4 more new stamp sets:


71

My Craft Spot - Fall Stamp Release Party - Day 2

Tuesday, September 4, 2012

Welcome to another day of sneak peeks from the NEW My Craft Spot fall release party!! Today, we are showcasing projects made with the Spooky Treats stamp set.  All stamps and metal dies will be available for purchase THIS Saturday!


I used A Frightful Affair to cut the witch and cauldron image.  I added Crackle Accents to the boots and cauldron and then used a bit of a used Bounce sheet for the smoke coming out of the cauldron.  


Before I adhered the witch and cauldron to my card base, I added a spider web border (punched with a Martha Stewart punch) layered with some Deep Purple crinkle ribbon from My Craft Spot


The "Double double" sentiment from the NEW My Craft Spot Spooky Treats stamp set was stamped several times and each line was then cut out using a Stampin' Up window punch.  I added some more "smoke" over the sentiment for a sinister effect.  I finished things off with two little bats cut from Wrap It Up.

Be sure to head over to My Craft Spot for more sneak peeks of the new Spooky Treats stamp set.  Plus, while you are there, leave a comment for Kimberly for your chance to win today's awesome prize!!

We are all back to school today.  I've been at work for a couple of weeks now, but students arrive back today.  For all of you heading back to school - or supporting children who are headed back to school - have a wonderful day and a fabulous year!!
15

Every Day is a Gift Card

Monday, March 12, 2012
Click HERE to see this week's Fantabulous Cricut project.  

It's time for "Manly Man" projects at My Craft Spot this week.


I decided to make a card using the antique car from Wrap it Up, and cut it from a variety of metallic cardstocks.  The car is popped for some added dimension.  The frame under the car is from Elegant Edges and I embossed the top layer with the Clockworks Cuttlebug folder.  I also used my crimper on the bottom mat.  I did lots of inking and added some brads on the wheels.


I finished things off with a wonderful sentiment from My Craft Spot's Happy Fall set.

If you've got a "man" project you need to make, now's the perfect opportunity to get to work!  You can enter it in this week's My Craft Spot challenge and be eligible to win a fantastic prize while you're at it!
26

My Craft Spot Valentine Stamp Release & Giveaway

Thursday, February 2, 2012
I am so excited to be showing you some of the projects that I've made with the new My Craft Spot Valentine stamp sets:  Build a Valentine and Always and Forever.  These sets are just perfect for creating all sorts of Valentine and love projects.  There's even an anniversary stamp!


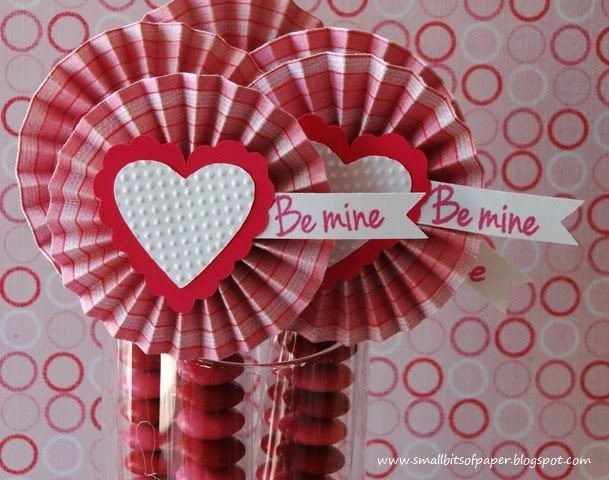
My first project is a set of cello bags filled with red and pink Smarties (candy coated milk chocolate, similar to - but much better than - MandMs).


For the toppers, I made rosettes from patterned paper and then added hearts from Gypsy Wanderings.  The white hearts are embossed using the inside of a 3x3 Cuttlebug butterfly folder.  I finished things off with a little "Be mine" tag from the Always and Forever set.  These treats are currently displayed on our dining room table and make for a lovely way to decorate for Valentine's Day - with a treat to enjoy at the end!


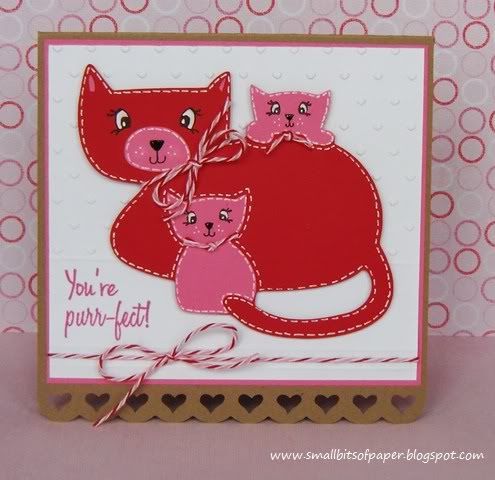
The base of this card was made with Elegant Edges and Plantin' SchoolBook.  I embossed the top portion of the white mat with a tiny hearts folder from the Cuttlebug Love Language set and scored some lines with my Martha Stewart score board.  The cat image is from Meow and I stamped the cats' eyes with stamps from Peachy Keen.  The noses are covered with Glossy Accents and I drew the little mouths by hand.


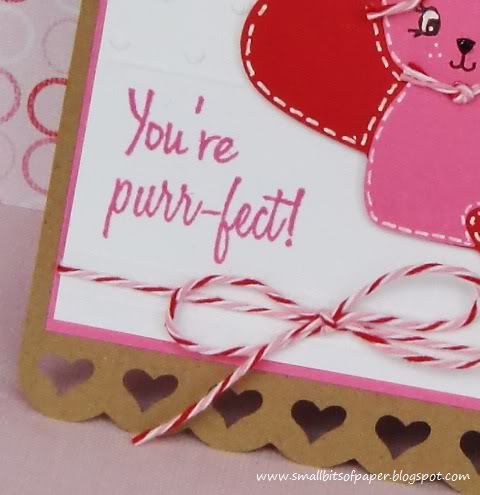
The sentiment is from the new Build a Valentine set and I finished things off with some fun Divine Valentine twine from My Craft Spot and lots of faux stitching.


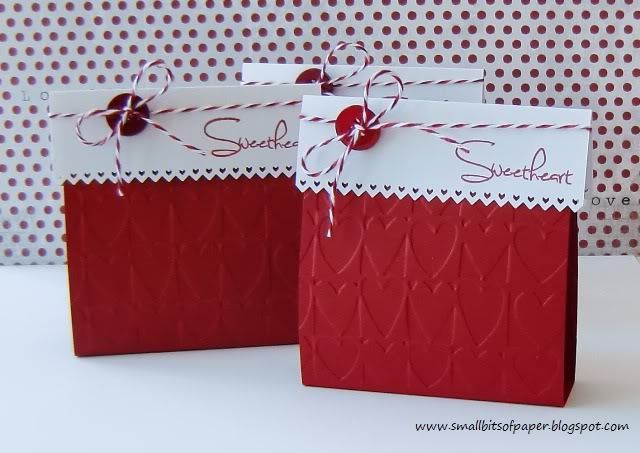
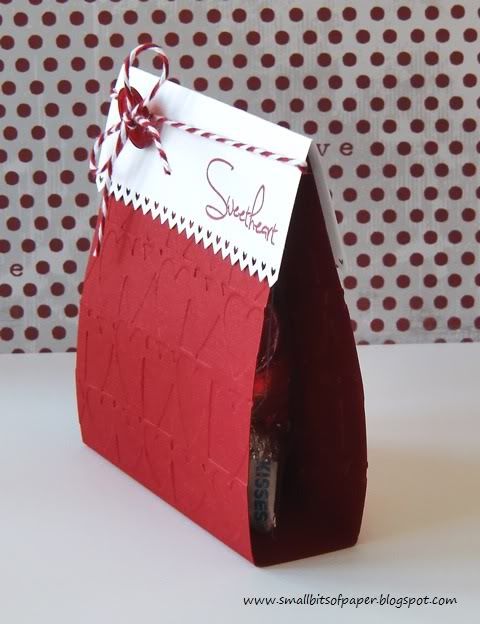
These candy tents were cut by hand, with the topper punched with a Stampin' Up border punch.  The bases of the tents were run through the Cuttlebug using the Heart Blocks embossing folder.


I stamped the tops with a Sweetheart sentiment from Always and Forever.  I added some baker's twine from My Craft Spot and a button to each - as well as a little baggie of Hershey's Kisses - to complete my project.


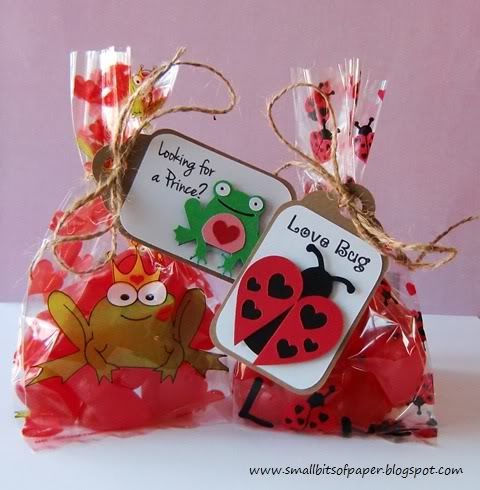
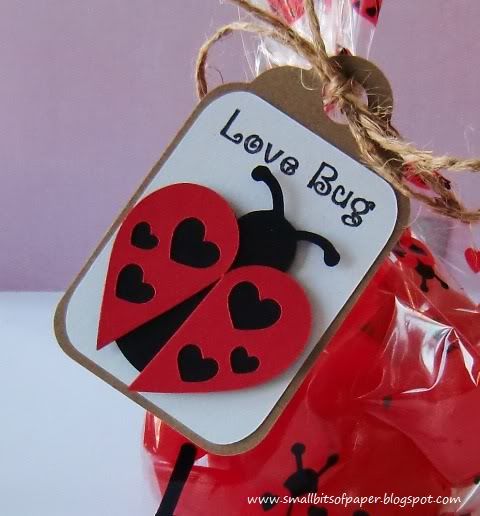
When I saw these treat bags at our local Bulk Barn, I couldn't believe my eyes!  It looks as though they were made to go with the Build a Valentine set from My Craft Spot!  Of course, I had to buy some and filled them with some heart-shaped jujubes. Both tags were cut using Wrap It Up and tied with some twine from my stash.  The tags were quick and easy to put together - but make for such a fun way to dress up the bags.


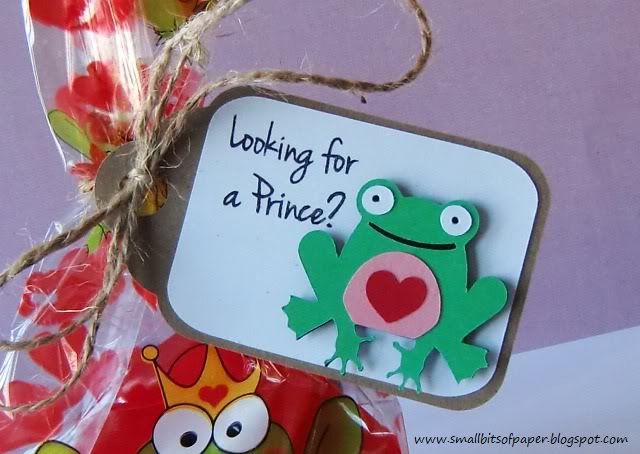
For the frog bag, I cut a little frog from Paisley and then stamped the "Looking for a prince?" sentiment from Build a Valentine.


The base of the ladybird is from Walk In My Garden and I created the custom wings (to coordinate better with the ladybirds on the bag) using hearts from Create a Critter, cutting the larger heart in half.  The "Love Bug" sentiment is also from Build a Valentine.


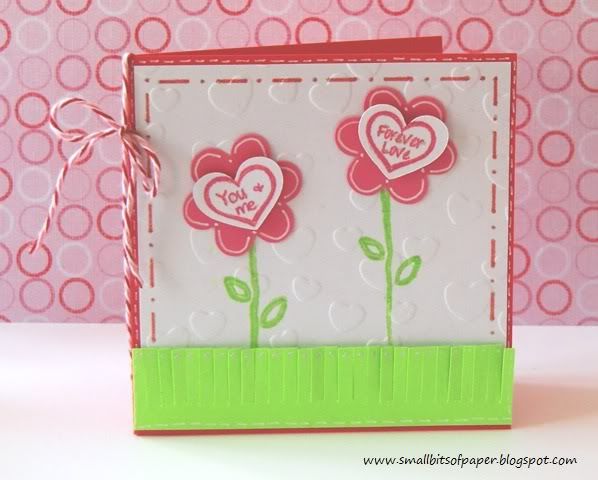
My final project is a little card made with conversation heart stamps from Build a Valentine.  I stamped the hearts on little hearts cut from Create a Critter.  The flowers were also cut from Create a Critter.  The stems are stamped and the mat embossed with a Hallmark embossing folder.  The grass was cut using Martha Stewart fringe scissors.  I did some doodling and also went over the sentiment and pink "stitching" and grass with a Stardust gel pen - so there's a nice glimmer in real life.  I finished everything off with some Divine Valentine twine from My Craft Spot.

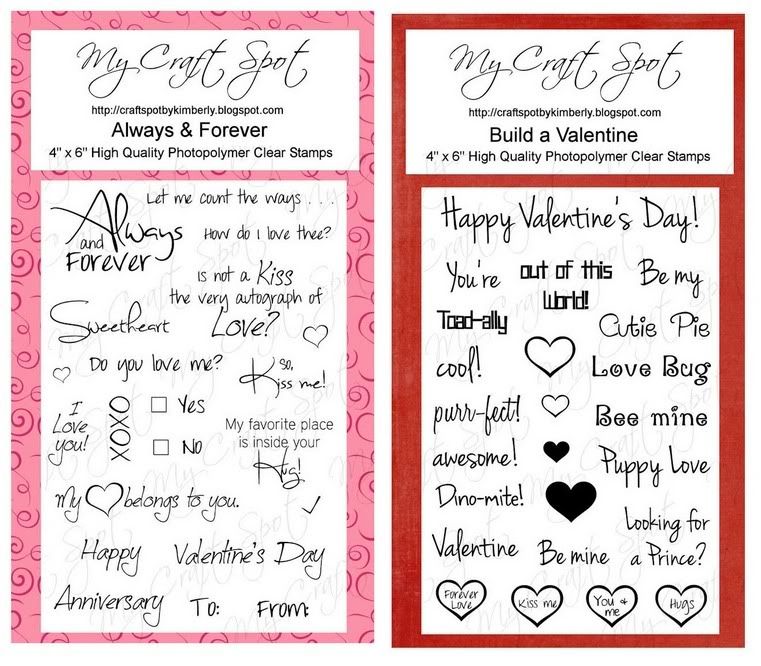
Here are the full sets of the stamps I've used for my projects above.  For many more project ideas and inspiration, head to My Craft Spot to see what Kimberly and the rest of the design team have been making!  I always love to see the different ideas and creations.

~ G I V E A W A Y ~
How would you like to win a My Craft Spot stamp set of your choice?  Kimberly has very generously donated a set to be given away on my blog.  All you need to do is:
  1. make sure you are a follower here at Small Bits of Paper
  2. leave a comment on this post.  
Don't forget to tell me which My Craft Spot stamp set is your favourite, in case you are the winner!  I will draw a name at random and announce the winner on Monday, so you have until Sunday at noon (EST) to enter.

~ W I N N E R S ~
Thanks to all of you who left such lovely comments last week's blog hops!  The winner of the $10 My Craft Spot gift certificate for the Cards for Kids Valentine's Day Blog Hop is Larelyn of Handmade from My Heart and the winner of the $10 My Craft Spot gift certificate for the Cricut Craftin' Grammy's Cricut Friends Blog Hop is Bobby of Bits & Pieces.  Congratulations Larelyn and Bobby!!  Please email me at smallbitsofpaper @ hotmail.com [remove spaces] so I can arrange to have your gift certificates sent to you.

*I am going to link up my Smarties tubes and Sweetheart tents at Decorate to Celebrate, where this week's theme is Valentine's Day Party.
61

Christmas Tags (and a Bag)

Monday, December 19, 2011
This week at My Craft Spot AND Fantabulous Cricut, we are challenging you to create tags.  With lots of gifts to be given, this challenge is the perfect way to create a little something extra to adorn your packages.


Some of the design team members at FCCB were provided with cardstock packages from Core'dinations.  I received two packs: Black Magic and Vintage.  I've heard lots about Core'dinations but have never owned any myself.  I was so excited to use the cardstock that I made two projects to try things out. 


My first project is a gift bag with tag.  The bag itself is prefabricated.  I cut a panel from the Core'dinations Black Magic cardstock pack and distressed it by using sandpaper and scrunching it.  The colour behind the black is yellow.  The wisemen image, cut from Inspired Heart, has a background colour of light purple.  I used sandpaper on the image and then covered it with a thin coat of Crackle Accents (which I just discovered thanks to Kimberly at My Craft Spot).  Using the yellow-backed cardstock, I cut a border, punched it with a Stampin' Up punch, and then distressed it with sandpaper.  I also used some sand seam binding from My Craft Spot and then added some light purple gems (which were a gift from my fellow Canadian blogging friend, Heather from Princess' Paper Projects).


The tag was cut from Inspired Heart.  I wanted the star to stand out a bit more so cut a larger one from Winter Frolic and popped it on the original.  There are actually four layers to the tag - a yellow-based frame, a purple-based frame and then the top star-frame in yellow with another yellow-based star on top.  Each layer was distressed and the star also received a thin coat of Crackle Accents.  I attached the tag to the bag with the same sand seam binding from My Craft Spot that I had used as a border on the bag itself.  I stamped the back of the tag with sentiments from My Craft Spot's Merry Christmas set.


My second tag was created using the Core'dinations Vintage Collection cardstock pack (although the white and black are regular cardstock).


This fun tag is a big one, measuring almost 7 inches high!  (It's to go on a rather large gift for my son.)  The green base is cut from Wrap It Up and I then covered the bottom portion with blue Core'dinations cardstock which I had torn.  I love the look!  Santa was cut from Christmas Cheer.  I embossed his beard with a D'Vine Swirls Cuttlebug folder and added Glossy Accents to his boots and the pompom on his hat.  The little snowflakes were punched with a Martha Stewart corner punch and I just used the negative pieces.  Each snowflake has a little gem on top.  I used a fun sentiment from My Craft Spot's 'Tis the Season set and then doodled all around the tag.  Santa has a bit of doodling too.  I finished everything off with a fabulous button from my sweet blogging friend, Audrey from Cute and Some, and some great Caribbean crinkle ribbon from My Craft Spot.


Please head over to Fantabulous Cricut to see the rest of the design team inspiration - and to see what else can be done with Core'dinations ColorCore Cardstock!  And don't forget to go to My Craft Spot to see all the wonderful projects there as well.  Kimberly just released some new twine - with colours perfect for Christmas and Valentine's Day!  It's not too late to add to your Christmas wish list!!  Plus, link up your projects at both blogs for your chance to win some fabulous prizes!

I wish you all a safe, happy and joyous Christmas!
28

Sweet Treats Gift Bag

Monday, December 5, 2011
First of all, I'd like to let you know that I have not been avoiding you!  I've got a lot on my plate right now as the semester wraps up and have been burning the candle at both ends.  I have a final paper due next week (which I am hoping to finish up within the next day or two) and am REALLY looking forward to some "me" time - which will include visits to some of my favourite blogs!  I'm so sorry that I've been missing your projects.  I always enjoy seeing your creations.


I actually created my bag for this week's project at My Craft Spot but noticed that it also fits the requirements for the challenge at Fantabulous Cricut so decided to add it to the Design Team line-up there as well.  At My Craft Spot, the challenge is to make a Christmas treats package - and at Fantabulous Cricut, the challenge is to create a gift package (or a gift, or even a project with a gift image).  I go CRAZY each year with my Christmas baking and love to make sweet treats to give away - and eat!  (So crazy that we are usually still eating Christmas treats in March!) For a good number of years now, a dear friend and I get together each year and spend a full day preparing dozens and dozens of fancy shortbread cookies.  I had our fancy shortbread cookies in mind when I created my bag.

I used Wrap It Up to create the bag and tag.  They are from the bride image, but I deleted the contours of the bride to have a solid bag and tag.  The ornament is from Jolly Holidays and I used rather a lot of Glossy Accents to make my ornament look more authentic.  The snowflake is from a Martha Stewart punch.  To create the sentiment, I used "sweet" from My Craft Spot's Friends and Neighbours set and "treats" from My Craft Spot's Candy Corn Kisses.  I also added a gold eyelet to the tag.  The ribbon is scarlet red crinkle ribbon from My Craft Spot and the gold string is from my stash.  I finished things off with a gold gem on the snowflake and a button on the bow.  This would have been a fairly simply bag to put together had it not been for my indecisiveness on the tag.  I think I made about 5 or 6 different tags before I finally settled on this one!!  I'm blaming my insanity on my sleepless nights...  The good news is, however, that I now have an elegant bag in which to present some of my elegant fancy shortbread.


Now it's your turn!  Please head to My Craft Spot AND Fantabulous Cricut for some wonderful inspiration - and then link up your own projects.  By the end of this week, I'm hoping to have some free time and would LOVE to spend some of it being inspired by your work.
25

Peace on Earth

Monday, November 28, 2011
It's time for another Challenge Me Monday at Fantabulous Cricut!  This week, it's all about holiday cards.  As I celebrate Christmas, I decided to make a Christmas card.


I used Celebrate with Flourish for the poinsettia image, but then built on it using petals from Wrap It Up.  I inked each petal using Stampin' Up ink as well as some gold Stampology ink - and added tiny gold brads to the centre of each flower.  The card base and frame are both from Elegant Edges.  (The card base was created by welding two images together and by removing the half circles on either side of the card in order for the border to fit across.)  The Cherry Cobbler border was punched with a Stampin' Up border punch.  I stamped my card with a sentiment from My Craft Spot's Merry Christmas set and also used some My Craft Spot pine green seam binding.  I inked the card base with both Cherry Cobbler and gold-coloured inks.  I finished things off with a couple of wine-coloured pearls.

With Christmas - and other celebrations - just around the corner, please head over to Fantabulous Cricut to link up your own holiday card!
30

Apple Addict

Sunday, October 2, 2011
To mark the beginning of Rosh Hashana, there's an "apple and honey" challenge going on at Cooking with Cricut.  My youngest is the BIGGEST fan of apples that ever there was so I couldn't let this challenge pass me by.  My son eats several apples a day (sometimes up to 6) and recently did an entire English assignment using only apples as his examples!  It was quite creative! 
My son helped me design the shirts on my Gypsy and took part in the production as well - although I did all the ironing.  The first shirt uses the apple from Wrap It Up and the letters are from Mickey Font.  The red and green vinyl are flocked and have a lovely texture to them.
The second shirt was created using a little character from Car Decals and the same apple, although my son said that the leaf should be off if the little character was eating it - so no leaf on the apple for this one!

I figured that "my honey" in his apple shirts suited the Cooking With Cricut challenge perfectly!!  L'shanah tovah to all who celebrate Rosh Hashanah!
15

World Card Making Day - and My Craft Spot Design Team Call!

Friday, September 30, 2011
I read on the Cricut Blog that tomorrow (Saturday) is World Card Making Day.  They are hosting a challenge to celebrate the occasion and I just had to participate!  

My very talented blogging friend, Jayne, of Jayne Designs, recently created a fabulous candle birthday card using the Wrap It Up cartridge.  You can see her original HERE.  Norma at Pink Bling Crafter also liked the idea so much that she made a candle card, too.  You can see Norma's card HERE.  I was also completely smitten by the card and I decided to try my own take on the design as well.
I created the card by welding two images of candle shape from Wrap It Up on my Gypsy.  (I flipped one of the images.)  I then cut the image again from some patterned cardstock.  I also cut the flame from coloured cardstock.  The bottom layer of the frame was run through the Cuttlebug using my Textured Script folder.  I welded a "1" charm from George and Basic Shapes to "today" letters from Tear Drop.  I added some crinkle ribbon from My Craft Spot, some gold fibre threads and made a little flower by layering some punched flowers from EK Success and adding a tiny bead and Glossy Accents to the middle.  I learned this flower technique from Nadia at With Glittering Eyes.  You can see her tutorial HERE.
*~*~*~*~*~*~*~*~*~*~*~*~*~*~*~*~*~*
My Craft Spot
*~*~*~*~*~*~*~*~*~*~*~*~*~*~*~*~*~*
I also have VERY exciting news for you!  Kimberly at My Craft Spot is having a Design Team Call!  There are four openings available!  (Don't worry - I'm delighted to still be part of the team and will continue to showcase the fabulous products from My Craft Spot.)  If you'd like to try out for the team, please link up your project by October 10.  Here are the requirements:
  1. Your project must be new for this design team call. 
  2. You can't be currently serving on a design team that sells products similar to those of My Craft Spot (stamp sets and crinkle ribbon).
  3. You must have a blog that you update regularly. 
  4. No design team experience necessary!  :) 
  5. You must be able to commit to a 6 month term. 
  6. With the project you are submitting, please post on your blog:
    • more pictures of your project
    • instructions telling how you made your project (recipe)
    • a link back to My Craft Spot to let everyone know you are trying out for this design team!
To try out for the My Craft Spot Design Team, link up your project HERE
*~*~*~*~*~*~*~*~*~*~*~*~*~*~*~*~*~*
    17

    My Craft Spot Release Party Blog Hop

    Friday, August 26, 2011
    Today is the day we reveal the NEW My Craft Spot stamps!  Each day this week, My Craft Spot has been giving sneak peaks of the FOUR new stamp sets.  I gave sneak peeks from two of those sets - on Tuesday and Thursday.  Today, each design team member will share more projects made with the new stamp sets during this blog hop.  And each of the blogs will be giving away one of these new stamp sets - so be sure to hop along, starting with Kimberly at My Craft Spot.
    I made two very different projects to share.  As many of you know, our house was flooded during a big storm earlier this month.  I made a set of thank you cards to show our appreciation to all those who helped us out (and continue to help us out!).  I used the new Friends and Neighbors - Inside and Out set for the sentiments.  The ark image is from the Inspired Hearts cartridge - and was just perfect considering our circumstances!  Paper is from My Mind's Eye and I added some Sky Blue crinkle ribbon (from My Craft Spot) for the water and to make a coordinating bow as well.
    And here is the Friends and Neighbors - Inside and Out stamp set:

    I used the new Happy Haunting stamp set for my second project - a fun Halloween gift bag! 
    I used Wrap It Up for the bag, image and tag.  The other little sentiment tags were cut by hand.  I added some smokey black and deep purple crinkle ribbon from the Hocus Pocus ribbon collection at My Craft Spot.  I frayed the ribbon for a spookier look as well and ran the transparency used for the window through my Cuttlebug, using the Swiss Dots folder.  I also added a purple button (from a set given to me by my sweet friend Carri from DoubleClick Connections) and a bit of green embroidery floss as well.  Aren't the stamps so fun - and just perfect for Halloween crafting!
    Do you see the fun MS Drippy Goo border?  I used Glossy Accents on the handle and border to add a bit more detail.
    Here is the new Happy Haunting stamp set:

    There are also two more stamp sets being released at My Craft Spot today - Candy Corn Kisses:

    And Happy Fall:
    These new stamps sets are all available today at My Craft Spot!  And don't forget that Kimberly offers free shipping to Canada and the US.  While you are at My Craft Spot, be sure to check out the delightful assortment of crinkle ribbon and baker's twine too!

    ***BLOG HOP PRIZE***

    Kimberly has very generously donated her new Friends and Neighbors - Inside and Out stamp set for me to give away.  All you need to do is leave a comment on this post to be entered to win!  So easy - and so fun!  I will draw a winner at random on Tuesday.

    Please check out the rest of the projects, starting with Kimberly at My Craft Spot.  Be sure to leave comments along the way to have a chance at winning on each blog!  Here's the list of My Craft Spot design team members to help you:

    Kate (That's me!)
    78
    Former Design Team Member at My Craft Spot (2011-2015)
    My Craft Spot


    Powered by Blogger.
    Follow on Bloglovin

    Followers

    >